Monday, August 30, 2010

Khara Bread / Masala Bread with Dill Flavor...Bangalore Iyengar Bakery's Way!!

A hidden foodie in me prompted me to give a trial of baking bread some time back but was not successful because of the poor quality of local yeast available here in India.My husband is very fond of freshly baked breads,naan's etc etc which uses yeast in it,so he promised me that he will buy yeast along with other goodies during his next visit to abroad.Thankfully he could manage to pick few boxes of yeast for me during his last visit to Singapore.
In Mumbai every evening the bread waala's knock the doors and delivers fresh bread,buying a loaf of bread is so convenient here that I never thought of baking a simple bread at home,of course I agree freshly baked bread tastes always better.I wanted to make use of the yeast in a more effective way like making goodies which I don't get that easily here in Mumbai.

In my earlier post I have mentioned my love for the Iyengar bakery goodies which we get in Bangalore especially their khara bread,khara bun,palya bun,plain cake,toast etc etc.I have made this khara bread some time back by adapting some tips and techniques from here and here and added my personal touch to the recipe.I love the flavor of dill leaves which adds a nice taste to this bread and the bread turned super soft and light.Baking breads has become my latest passion after the successful attempt of khara bread which I have already made quite a lot of times.You will get to see lots of my baking experiments from now on in my blog which are already sitting in my drafts.

Ingredients:
3 1/4 cups all purpose flour + extra flour while kneading required
2 tsp active dry yeast
1 1/2 tbsp sugar
1 tsp salt
3/4 cup water
1/2 cup milk
2 tbsp olive oil or regular vegetable oil

For the Masala:
1 small bunch dill leaves,finely chopped
1 small bunch coriander leaves,finely chopped
1 big onion,very finely chopped
1 tbsp green chilli paste,coarsely ground
1 tsp cumin seeds
2-3 generous pinches of salt
1 tbsp olive oil or regular vegetable oil

Other Ingredients:
1 tsp black sesame seeds to sprinkle over top
1 tsp butter to brush the bread
1 tsp milk to brush the bread
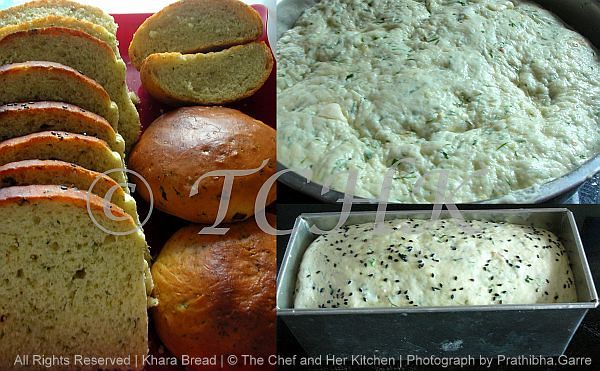
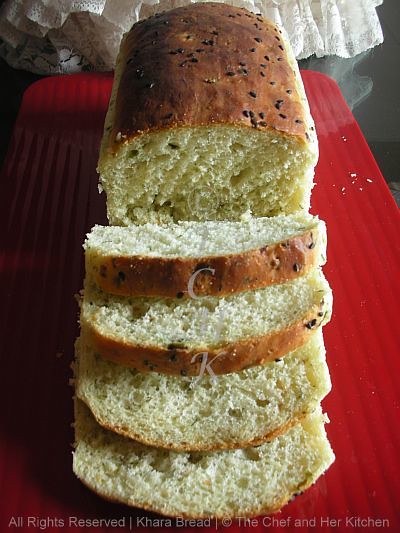
Method:
  • Microwave water and milk together for 30 seconds until it is luke warm to touch.Pour this into a wide bottomed bowl.
  • Dissolve in the sugar and yeast in it and mix thoroughly until dissolved.Leave this aside for 15-20 mins until the yeast mixture becomes frothy.This is the important step in proceeding further to the recipe.If the yeast does not proof throw it and start the process again from the scratch.
  • Meanwhile heat olive oil or regular oil in a pan and crackle cumin seeds over low flame and add very finely chopped onion and fry until it is translucent,add a pinch of salt in between to ease the process.Add coarsely ground chilli paste,chopped greens and mix well and stir fry for a minute.Add enough salt to it and do remember that we add salt even to the dough.Keep it aside until the mixture is cooled.
  • Stir in the olive oil and salt to the frothy yeast mixture and slowly add cup by cup of flour into it and mix well,I used a wire whisk for this purpose and mix until you get a lump of smooth dough.
  • Now put some flour on the broad white board or feel free to use the well cleaned and wiped kitchen platform(like I did) and take the lump in both hands and knead the bread towards you.
  • Follow the same method and knead it properly for 10 mins roughly until you get a non-sticky but still smooth dough.Add flour in between when the dough is sticky.
  • Now slightly press the dough with your hands to flatten it and keep the masala(fried onion-greens) mixture in the centre and fold it from all the sides like how we do for stuffed paratha's.
  • Slowly start kneading again for 12-15 mins until the mixture is very well incorporated in the dough.The dough might become sticky because of the onions,so please feel free to add the flour when required while kneading the dough.
  • Cover this place of platform or the board with some cloth or paper as we need to use this place again for kneading.
  • Now grease your hands and a empty big bowl with oil and coat the dough with oil slightly and place it in the greased bowl.Cover with a clean kitchen towel and keep it in warm place until the dough doubles almost.It takes almost one to one-and-half hours depending the climatic conditions.I preheated my microwave for 20 seconds and kept the bowl in it.
  • After the first rise the dough would have doubled in size,take a knife and cut into two halves for two medium loaves.Otherwise cut into 3/4 and 1/4 th portions to make a big loaf and 4-5 medium sized buns like I did.
  • Now again knead the dough gently for 7-8 mins,this process is important as it assures of removing air bubbles formed in the dough.Repeat the process with the other portion as well.
  • Shape one portion into a loaf and place it in the greased loaf pan(9"x5").Divide the other portion of dough into 4-5 portion and shape them into buns and place them on a baking tray with space in between.
  • Keep them again in the warm place for 45 mins - 1 hour for the final rise.Mean while preheat the oven at 220 degrees for 10 mins when you are about to finish the rising time of bread.
  • Brush the top of loaf and buns with milk very gently and sprinkle black sesame seeds over the nicely risen loaf and buns and keep it in preheated oven and bake them at 180 degrees for 15-20 mins until the top portion of the bread turn slightly golden and the bread should sound hollow when tapped the crust with hand.I baked the bread and buns separately as my oven size is small,you should take care when you are baking both the bread and buns at the same time as the buns get baked fast.
  • Brush the top of the bread and buns with butter immediately after removing them from oven.This helps in giving the shine to the crust and also makes the crust softer and even the smell of the bread will be nice.
  • Run the knife around the edges and slowly remove the bread from the pan and let it cool on the wire rack.
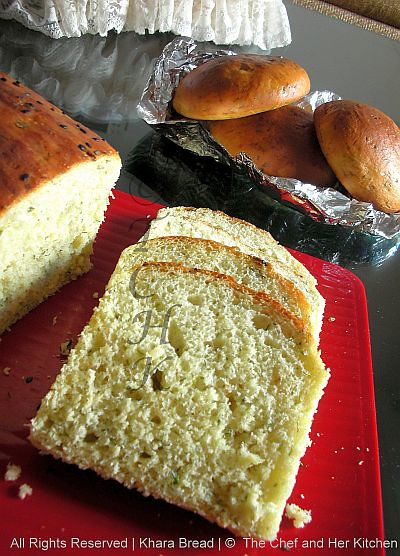
Cut into the slices of desired thickness.Apply generously a dollop of fresh butter on the slice before serving.

This goes straight to champa's 'Bake-Off' event,'EFM-Cakes and Bakes' event going on at Srish Kitchen and also to Pari's 'ONLY-Kids' event.

image

Thursday, August 26, 2010

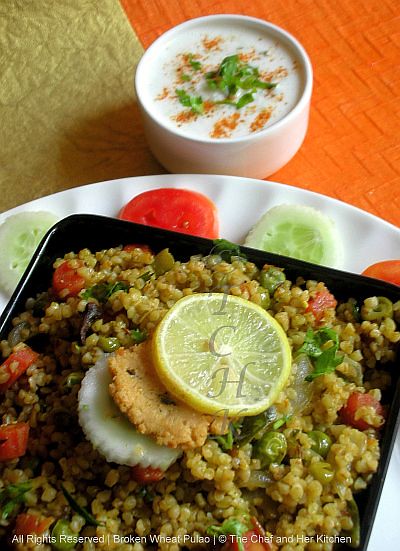
Broken Wheat(Lapsi) Vegetable Masala Pulao

This can be prepared either for breakfast,lunch or dinner as this is a very healthy one pot dish which is high in fibre,vitamin and complex carbohydrates and is also a great dish for diabetic people.Generally broken wheat is used in making dalia(porridge), kheer and upma.This version is bit unusual from the regular upma as this includes the spices and is loaded with lots of vegetables which makes it still healthier.

Ingredients:
1 cup broken wheat or Lapsi
1 onion,roughly chopped

1 small carrot,diced into 1/4"
cubes
5-6 french beans,threaded and cut into 1/4" pieces

1 small potato,diced into 1/4" cubes
2-3 cauliflower florets,cut into thin pieces
1/4 cup green peas

1/2 tsp cumin seeds

juice of 1 small lemon
salt to taste

1 tsp ghee
3 tsp oil
2 1/2 cups of water

To grind:
1/2 cup coriander leaves
1/4 cup mint leaves

4-5 green chillies

3/4" ginger
2-3 garlic pods

3-4 cloves
1/2 " cinnamon

1 green cardamom


For garnish:
2 tbsp chopped coriander
1 tbsp grated coconut(optional)

Method:
  • Heat a tsp of oil in a kadai and fry broken wheat until light brown in color.Let it cool and keep aside.
  • Grind cloves,cinnamon,cardamom to a coarse powder.Add ginger,garlic and green chillies to it and blend again.
  • Add coriander and mint leaves and grind to a coarse paste.
  • Heat 2tsp oil and 1 tsp ghee in a thick bottomed pan or pressure cooker and crackle cumin seeds.
  • Add chopped onions and fry until they are translucent.Add all the vegetables one by one and fry them for 3-4 mins.
  • Add ground masala paste and fry until dry and add the measured water and let it come to a boil and add enough salt and broken wheat and mix well and cook it covered for 4-5 mins until the broken wheat is cooked.If you are using pressure cooker,pressure cook it for 1 whistle.
  • Once you open the lid add lemon juice and coriander and mix well.
  • Garnish with coriander and grated coconut.
Serve it hot with vegetable or simple onion raita ,papad and salad.

Note:
  • For a Vegan version avoid ghee in the recipe.

Monday, August 23, 2010

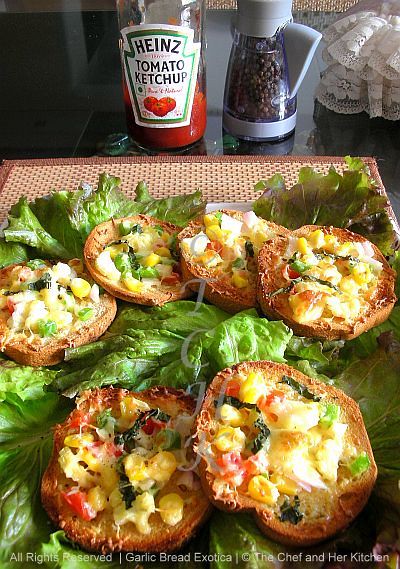
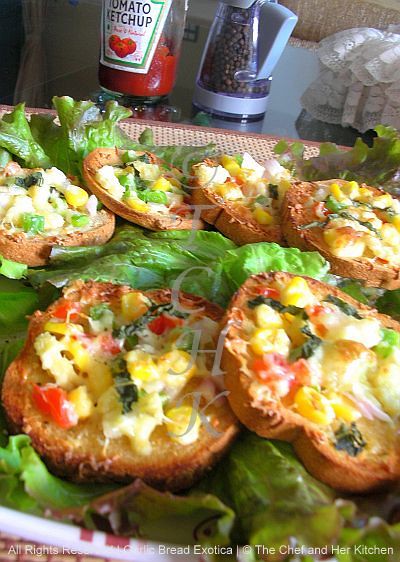
Garlic Bread Exotica

I am sure many people would be liking the garlic bread from pizza hut,this Garlic bread Exotica is always my favorite from Pizza hut.The fancy name Exotica is given to this because unlike the regular garlic bread this has some veggie toppings and lovely cheese over it .Garlic bread is traditionally prepared with french Baguette which has slightly crisp crust and softer inside but you can even prepare with regular bread. Last week I found these cute roundels in Mongini's,a popular bakery in Mumbai and I could not stop myself from buying them.The minute I saw them I know that I would not use them for sandwiches and will definitely enjoy making garlic bread with those cute roundels.This garlic bread is made according to my personal preference and almost replicates our favorite Pizza hut version.This is definitely a great appetizer for parties or it can be a good evening snack for kids and adults.This is even a ideal combination with soups,salad's and pasta's.

Ingredients:
12-15 slices of Baguette or regular bread or roundels
1/2 cup colored bell peppers,chopped(I used only green colored one)

4 tbsp onions,chopped

3 tbsp tomato,seeded and chopped

3 tbsp fresh/frozen corn kernels
1 baby corn,sliced into rounds(optional)
2 green chili's,finely chopped(for Indian touch,optional if making for kids)
5-6 tbsp grated mozzarella cheese(I used a mix of mozzarella and cheddar)

1 tsp red chili flakes or coarsely ground pepper

salt to taste


for Garlic spread:
3 tbsp butter,at room temperature
6-8 garlic pods,very finely chopped

1/2 tsp mixed Italian herbs
1 tsp chopped fresh basil(optional)


Method:
  • Mix butter with the finely chopped or minced garlic pods,Italian herbs and chopped fresh basil and keep it aside.
  • If you are using baguette cut it into thick 1" size slices diagonally and if you are using regular bread you can cut into rounds by using a big cookie cutter or just cut the edges and keep them as they are or cut into triangles.
  • Mix all the chopped vegetables peppers,tomato,corn,onions and green chillies in a bowl and keep it aside.
  • Take each roundel or triangle of bread and apply garlic spread and put one 2 tsp of mixed vegetables over it and sprinkle salt and red chilli flakes and top it with 2tsp of cheese(add according to your choice).
  • Arrange a baking sheet or aluminum foil over the baking tray and place all the bread and put it in pre heated oven at 160 degrees and broil it for 2-3 mins until the edges of bread are slight crisp and the cheese starts melting.
Remove it and sprinkle some more pepper flakes and serve them hot with tomato ketchup. I had mine for breakfast with some fresh mixed vegeatble salad.

I am sending this entry to Pari's 'ONLY'-Kids Delight event as this is ideal snack for kids

image

and this also goes to Sharmi's first event 'Lets Munch:Light Tea Snacks'.I wish her all the best for the first event.


Puliyogare/Tamarind Rice/ Puli sadham

Friday, August 20, 2010

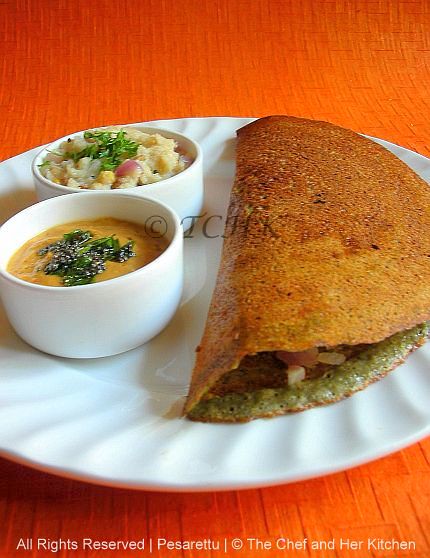
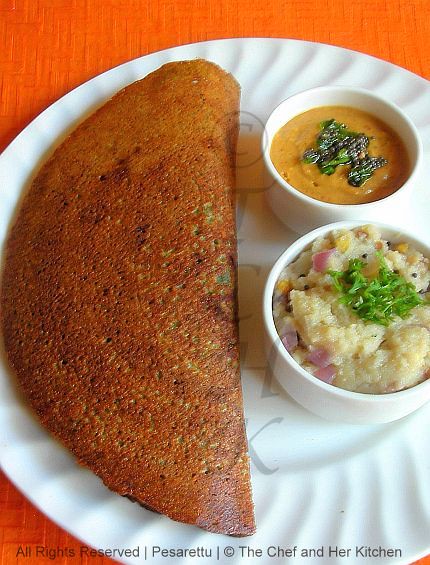
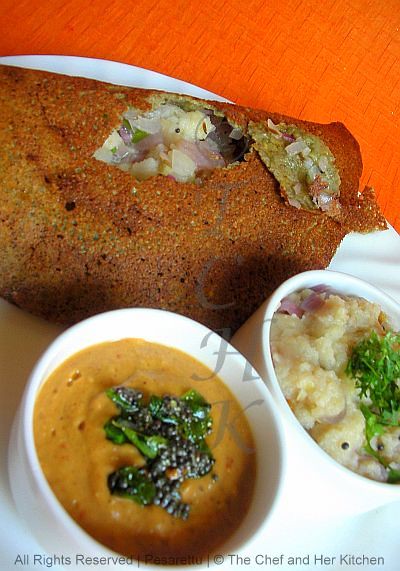
MLA Pesarattu ..aka.... Upma Pesarattu....Andhra's Signature Recipe


I am sure all of us are aware of this famous Andhra breakfast which is called 'MLA pesarattu'
and when combined with upma it is called 'Upma Pesarattu'.I got to know only today the reason behind the name MLA pesarattu,what I understood by googling today is that pesarattu is famous among the canteen's and restaurants in the MLA Quarters of Hyderabad and that is the reason why it is called MLA Pesarattu.

Coming to the recipe unlike the regular dosa's these are prepared with whole green gram traditionally or sometimes with the yellow moong dal(not the authentic pesarattu) and is sprinkled over with onion-ginger-green chilli-Jeera mixture and stuffed with upma, and is served with tangy and fiery Allam pacchadi(Ginger Chutney).These are always preferably better than regular dosa's as it uses minimum quantity of rice and more whole green gram which is good in proteins.
I have already posted a few variations of this regular pesarattu like Whole green gram Adai and Sprouted gram's Adai.

As a kid I never liked the taste of Pesarattu as it is dominated with the flavor from the whole moong.So when I came across the recipe for
Whole green gram Adai from a neighbor I liked the taste of it as it has less moong and more rice and the batter is fermented to give a tangy taste to the adai.Now I have overcome the problem of not eating regular pesarattu as soaking the moong for longer time and changing the water twice and adding ginger while grinding the batter really helps in removing the smell to an extent.This is my version of Pesarattu which is less or same as prepared in any other house holds just that I make my pesarattu crisp which I always prefer my dosa's to be crisp as you all know about my dosa funda which I mentioned here and here.If you are new to my blog and you are a dosa lover do definitely read my most famous Mysore Masala Dosa and Paper Rava Dosa posts for some useful tips to get crispier dosa.

Ingredients:
2 heaped cups whole green gram
a handful of raw rice
2 green chillies

1" ginger

oil and ghee as required

salt to taste

For the filling:
1 big onion,very finely chopped
2 green chillies,very finely cut
1" ginger,finely chopped

1 tsp cumin seeds


For Upma stuffing:
1/2 cup sooji/rava
1 medium onion,chopped

2-3 green chillies,chopped

1/2" ginger,chopped

2 tsp chana dal

1 tsp urad dal
1/2 tsp mustard seeds

6-8 curry leaves chopped
1 tbsp chopped coriander
1 tbsp lemon juice
1 tbsp oil

salt to taste


Method:
To make Upma:
  • Dry roast the rava until the nice aroma comes out of it.Keep it aside and let it cool.
  • In a kadai heat oil and crackle mustard seeds and add urad and chana dal and fry until they are slight golden in color.
  • Add green chillies,curry leaves,ginger and fry for a minute.
  • Add chopped onions and fry until they are translucent.
  • Add 1 and 1/2 cups of water to it and let it come to a boil,add salt and add the rava slowly by stirring it continuously.Keep covered and let it cook on low flame for 3-4 mins.
  • Add lemon juice and coriander and mix well and cover it with lid.Keep it warm until you stuff it in pesarattu.Do not let it become cold.
To make Pesarattu:
  • Soak the whole green gram and rice overnight or for a minimum 2-3hrs and change the water twice.
  • Grind green gram and rice with green chillies,ginger in a wet grinder(you can even use regular mixie) until you get a slighltly coarse batter similar to that of dosa consistency.
  • Empty the batter into a bowl and add enough salt and mix well.
  • Mix batter well.Pour a big ladle of batter onto a medium hot pan into a dosa,it should be slightly thicker than the regular dosa.
  • Pour 1 tbsp oil approx over it and cover it with a lid.(No need to add more oil if using Non stick pan,you can completely replace oil with ghee for better taste if you are not calorie conscious).
  • Let it initially cook on low flame for 1-2 mins and remove the lid and increase the flame later and cook for a couple of mins until you see brown/red patches.(No need to turn the pesarattu).But do not try to remove the pesarattu between while it is roasting.We should remove it only when you are sure that it is perfectly roasted.
  • Mean while mix well finely chopped onions,ginger,cumin seeds and green chillies.
  • Remove the lid and pour some ghee in the center and sprinkle the onion mixture over evenly and place upma on one side and fold the pesarattu.You can even close it from two sides or three sides like we get in hotels.
  • Brush the pesarattu with ghee and place it in the center of the pan to make it more crispier.
  • Serve it directly and do not drop them in hot boxes.It should be served on to the plate immediately to enjoy the flavor and crispiness of the pesarattu.
  • Reduce the flame for one minute and sprinkle water and wait until it heats up and then start preparing the next one.Do not pour the batter on high flame the batter will stick to the pan and will not let us to spread it evenly.
Serve it hot right off from the flame with Ginger chutney or Coconut chutney.It tastes best with ginger chutney and the pesarattu is traditionally served with it.

Note:
  • Instant Version : When you did not plan to make this and did not soak the gram,you can still even grind whole green gram instantly without soaking in water and add a handful of rice flour,green chillies,ginger while grinding it.Even the pesarattu's made by this process also yield good crispy one's but I personally like it when it is soaked and done.
  • Make Upma as simple as possible without adding any vegetables or tomato.It tastes best when the flavor of pesarattu is dominated instead of upma taste.
  • For a Vegan version avoid ghee and use as much oil as required for frying pesarattu.

Ginger Chutney / Allam Pacchadi :


Ingredients:
2 " ginger,sliced
2-3 garlic cloves(optional)

1 tbsp urad dal

4-5 red chillies
2 tbsp thick tamarind pulp

1 tbsp grated jaggery

1 tsp oil

salt to taste


for Tadka:
1/2 tsp mustard seeds
5-6 curry leaves,chopped
a pinch of hing
1 tsp ghee/oil


Method:
  • Heat 1/2 tsp of oil and roast red chillies slightly and keep it aside.
  • In the same oil add urad dal and fry until red in color and keep it aside.
  • Add 1/2 tsp oil or ghee to the kadai and add ginger pieces and fry slightly and add garlic pods and just stir it and switch off the flame.
  • Grind roasted red chillies,fried urad dal,jaggery and salt to a coarse powder.Add fried ginger,garlic,tamarind pulp and enough water and blend into a smooth chutney.
  • Heat ghee/oil in the same kadai and crackle mustard seeds and add curry leaves and hing and fry for few seconds and add the tadka to the chutney and mix well.
Serve it with Pesarattu / Idli / Dosa / Wada.

Note:
You can even replace urad dal with fried gram and follow the same process.No need to fry the fried gram in oil.

Tuesday, August 17, 2010

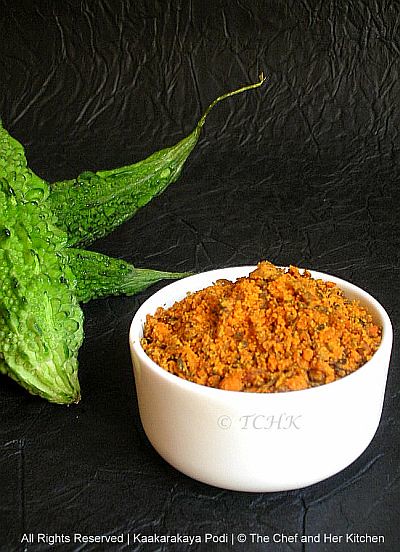
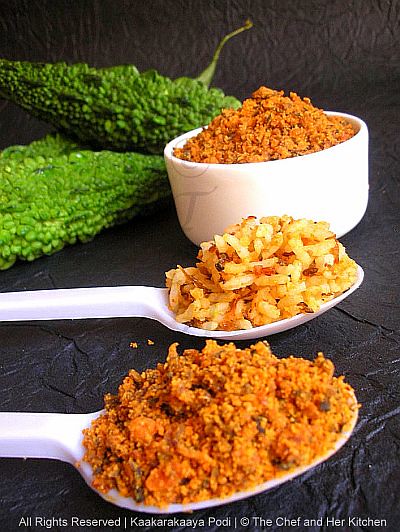
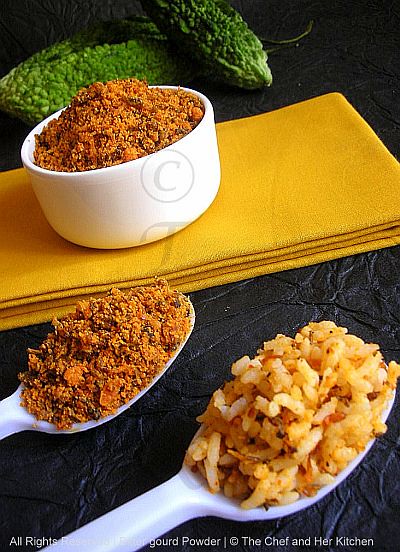
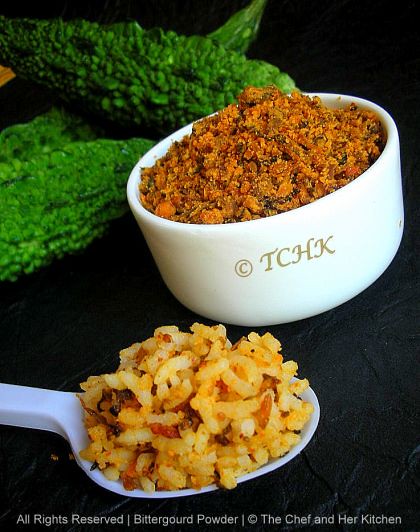
Kakarakaya Podi / Bittergourd Powder

After my sweet post now comes my bitter post because 'BITTER' is 'BETTER'...ha ha..
I have mentioned in my earlier posts that Bittergourd is the most favorite vegetable for my husband and is also a favorite vegetable at my in-laws place too.The way it is cooked in my in-laws place is quite different from my mom's place as in my in-laws place they don't bother to remove the bitterness as they all like the bitter taste of it but it is not the same with me.I can eat bittergourd only if it is cooked in such a way that its bitterness is removed.My mom cooks the bittergourd in such a way that no one could ever say 'NO' to that 'bitter' Bittergourd being it in the form of fry,stew,curry or this podi. Bittergourd powder is one such classic preparation by my mom that it is loved by everyone and I am sure that even a non-bittergourd lover will definitely like it without any doubt.This is a perfect balanced powder where the bitterness of the bittergourd is reduced and is balanced with the sweetness of onions and dry coconut and fiery hot red chillies.It tastes best when mixed with hot rice and sesame oil and biting into the raw onions......hmmm...it tastes so yummy.

If you have a fussy eater at home for bitter gourd you can definitely try this one for them and if you are a bitter gourd lover this is definitely a treat for you.

Ingredients:
1/2 kg Bittergourd
4 big Onions,very finely chopped
1 heaped cup grated dry coconut
3 tbps curds
15 red chillies,fiery hot one's
a gooseberry sized tamarind
1/2 cup regular oil approximately
salt to taste

Method:
  • Grate the bittergourds with a fine grater.Add salt and curds to it and mix well and leave it aside for 1 hr.Now squeeze the water completely from the bitter gourd and keep it aside.This step is mandatory in order to ease the process of frying the bittergourd and storing the powder,it will also remove 60-70% of the bitterness.If you still want to remove more bitterness wash the squeezed bitter gourd and squeeze the water again.Take care that no water should be present in the squeezed bitter gourd,repeat the process twice if needed.
  • Tear the tamarind into small pieces and slightly dry roast the red chillies and tamarind for few seconds.This step is however optional if your red chillies are softer and tamarind is slightly damp.
  • Now grind the red chillies,tamarind,dry coconut with salt to a slight coarse powder.
  • In a thick bottomed kadai heat oil(1/2 cup approximately) add squeezed bitter gourd and fry on a very low flame until it is slight golden in color(75-80% done),it approximately takes 15-20 mins.This step is very important and it is to be on very low flame.
  • Now add the very finely chopped onions to the bitter gourd and fry on a very low flame until the onions and bittergourd is deep golden in color.It takes for around 15 mins again.
  • Add the ground spice mixture to it and mix well and keep stirring on low flame for 3-4 mins and remove it from the stove.
  • Cool the powder completely and store it in air tight container.
Serve it with hot rice and a dollop of ghee or sesame oil and finely cut raw onions.I personally prefer to eat it with sesame oil and raw onion.

Note:
  • It stays good outside for 20 days without any problem and if you keep it in refrigerator you can store it for 2-3 months.I hope that it would not last that longer if you are someone like us it should get over in less than a month.
  • Updated:It is mandatory to squeeze the water from the bitter gourd in order to fry the bitter gourd crispier and helps in storing for long.Squeezing of water from bitter gourd is not just to remove the bitterness from it,it helps in quick frying,storage and even enhances the taste and it also helps in consuming less amount of oil.
  • For a Vegan version add salt and turmeric powder to bitter gourd to remove the bitterness instead of curds in the recipe.

Friday, August 13, 2010

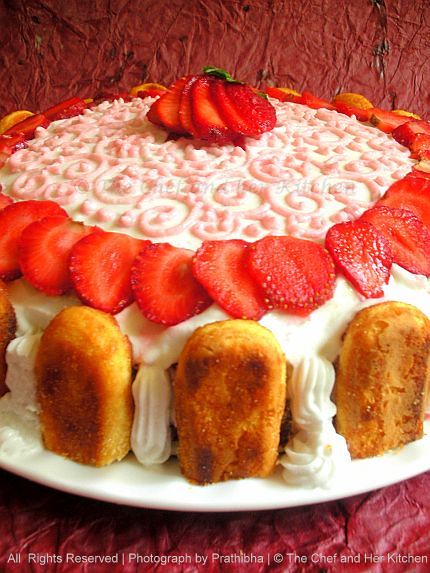
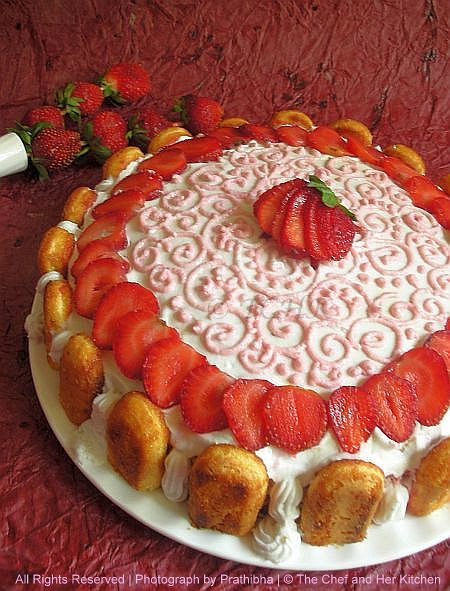
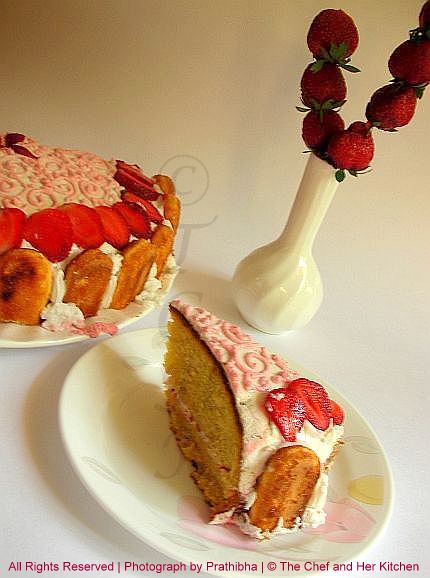
Eggless Sponge Gateau/Cake with Strawberry Cream Icing........and my 150th post!!!


Another milestone post from me,yes it is my 150th post today.

Milestone posts are very close to my heart as I try making something different or exotic to make the post more memorable.Don't assume that I made this cake specially for my 150th post,I made this cake almost 5 months before on the occasion of my birthday and when the beautiful luscious strawberries were in season.Somehow I kept post poing doing this post because of my frequent breaks in blogging and I think now I got the perfect opportunity to showcase my beautiful cake for this special post.

And now to the flash back.......hmmm.....As my In-laws were expected to arrive on my birthday I could not control myself from baking a cake for my own birthday(I really hate to bake a cake for my own birthday,but could not help it) and so I preferred a egg-less version of the basic vanilla sponge cake which I adapted from Nita Mehta's Cake book.More than baking a cake I am very much interested in learning to decorate a cake and I always get excited to see the beautiful cake decorations by our fellow bloggers.One such decoration that sat in my head was this beautiful cake done by Deeba .Eventhough I am just a beginner, I thought of attempting to decorate such a exotic one and to my surprise the outcome was so good that my inlaws were excited and happy to see that cake and showered me with lots of praisings which made me to forget the pain I took in decorating it.

And coming back to the present,I personally thank all my bloggers friends for their constant support which helps me in reaching many more milestones like this.
I hope you all enjoy this post.

Ingredients:

For Eggless Sponge Cake:
1 1/4 cups Maida
1/4 cup cornflour

1/2 tin condensed milk
1/2 tsp level soda-bicarb

1 tsp level baking powder
1/2 cup oil
4 tbsp powdered sugar

1/2 cup milk

1 1/2 tsp Vanilla Essence

For Cream Icing:
1 pack whipped cream powder(I used some imported variety available here)
3-4 tbsp powdered sugar

4 tbsp finely chopped fresh strawberries

2 tbsp strawberry crush


for Sugar Syrup:
1/2 cup water
1/4 cup sugar

few drops of lemon juice


other Ingredients for decoration:
6-8 strawberries,finely sliced
8-10 Italian finger biscuits


Method:

Eggless Sponge Cake:
  • Sift maida with cornflour,soda bicarb and baking powder.Keep aside.
  • Beat condensed milk with hand blender and add sugar gradually and beat till fluffy.Add oil to the mixture and beat well.
  • Add half the flour mixture and half the quantity of milk and beat well.Add vanilla essence,remaining flour and milk beating well after each addition.Beat well for 3-4mins till the mixture is smooth and light and attains a thick pouring ribbon consistency.
  • Pour the mixture into a greased and lined round 7" tin.
  • Bake for 30-35 mins in a preheated oven at 150 degrees until the cake is done.Test it by using a toothpick test,if the toothpick comes out clean then the cake is well cooked.
  • Remove it from the mould carefully and let it cool completely on the wire rack.It is better to prepare the cake a day before you want to decorate it.
Sugar Syrup:
Boil water along with sugar until it forms a nice syrupy liquid,strain the water and let it cool.Add lemon juice to it and mix and keep it in fridge.

Whipping up the cream to spread and for piping:
  • Beat the whipped cream powder on medium speed till thick.
  • Only after it turns thick,then add powdered sugar and continue beating on high speed till you get the soft peaks.Chill it for some time.Check the sweetness at this point as some ready mix packets have sugar already in it,so add according to your taste
  • Divide the mixture into 3 parts.Reserve one major portion for topping the cake.
  • Add very finely chopped strawberries to the other portion of the cream and gently fold in.
  • In 4-5tbsp of whipped cream add 2 tbsp strawberry crush and gently mix well and pour it into the cone made up of baking paper and tie it with a thread and let it stand in a glass and keep it in the refrigerator until its usage.
  • In another piping bag which has star nozzle fitted fill in the 6-8 tbsp plain whipped cream and refrigerate it until its usage.
Assembling and Decorating the Cake:
  • Level the cake gently using a knife(to cut) to form a uniform surface.
  • Based on the size of your cake cut it into two or three pieces horizontal to form layers.I did mine into two layers. .
  • Place one layer on the serving platter
  • Pour the lemon-sugar syrup mixture all over the cake to make it enough moist.Do not add much as it makes the cake very soggy later.
  • Apply the whipped cream mixed with finely chopped strawberries on the first layer and place the second layer over it and pour again the lemon-sugar syrup mixture all over the cake to make it enough moist.
  • Apply the plain whipped cream all over the cake and make sure that it is uniformly applied all over and on the sides using a flat spatula by dipping it in water in between which helps in spreading the cream uniformly.
  • Cut the Italian fingers into two equal sized pieces.Slice the strawberries very thin lengthwise and keep them aside.Slice one strawberry with the leaves in tact with the layers of the sliced strawberry which is used for decorating on top.
  • Stick the Italian fingers leaving some space in between around the sides of the cake.
  • Slowly using the cone make a design of your own with the strawberry flavored cream cone This step is completely of your choice and to your creativity, just do it in the way you want.
  • Using the star nozzle cream cone make the straight line and a star down the line in between the two Italian fingers.Please check the pictures for detailed decoration as the pictures themselves explain how it is done.
  • Arrange the strawberry slices around the edge of the cake as shown in the picture and gently keep a sliced and layered strawberry in the centre.
Chill it in the refrigerator and slice it gently and serve chilled.

Tuesday, August 10, 2010

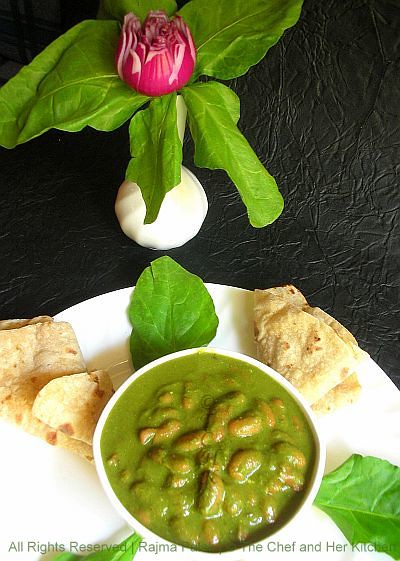
Rajma Palak

Spinach is one of my favorite greens which one can find it on my table atleast once a week.I make palak paneer,alu palak,palak kofta curry occasionally just to avoid using paneer and alu at regular basis. One can use their imagination to create many healthier options using those lovely greens other than using them in regular dal's and stir fries as they are very versatile to mingle with any ingredient.I add sometimes soya chunks or fried tofu instead of paneer to make a healthier option.Adding Rajma/other beans to the gravy makes a complete protein packed food in one single dish.You can even substitute rajma with other beans like garbanzo beans,whole green moong and one can even add mashed paneer to make the gravy still tastier.
This again goes to Divya's 'Show me your Curry' event.
Ingredients:
1 bunch spinach,washed and chopped
1 cup rajma,soaked overnight
1 big onion,sliced
1 cup milk or 1/3 cup cream
2 tsp Ginger-Garlic paste
5-6 green chillies
1 tsp amchur powder
1 tsp coriander powder
3/4 tsp jeera powder
1/2 tsp Garam masala
1/2" cinnamon
1/2 tsp cumin seeds
a pinch of hing
salt to taste
1 tbsp oil
salt to taste

Method:
  • Soak Rajma in enough water overnight and change the water once.
  • Heat 1/2 tsp oil in a pressure cooker and add cinnamon and 1 slit green chilli and fry for a
  • minute.
  • Add soaked rajma to it and add enough water and salt to it and pressure cook for 2 whistles and simmer for 10-12 mins until the rajma beans are soft and not mushy.
  • In a pot bring water to a boil and add cleaned and chopped spinach,green chillies and sliced onions and cook for a couple of minutes.Remove it immediately from it and run the spinach mixture through tap water to retain the color of the spinach while cooking.
  • Grind spinach,onions and green chillies to a fine paste.
  • Heat oil in a kadai and crackle cumin seeds and add ginger garlic paste and fry for a minute.
  • Add coriander and jeera powder's to it and fry well.Add spinach and onion puree and fry until the oil separates from the pan.
  • Add cooked rajma(removing extra water) and add milk(or cream) and mix well.Check for the consistency and add enough water(use drained water from rajma) if required.Simmer it for 8-10mins.
  • Add salt to taste(remember we added salt while cooking rajma),garam masala and amchur powder and mix well.
  • Remove it from the stove and garnish with fresh cream and serve hot.
Serve it hot with phulka/chapathy/Naan/Kulcha/pulao's.

Note:
  • I always avoid mixing tomato and palak in the same dish,instead I add either lemon juice or amchur powder to give sourness to the dish.It is your personal choice to include what ever you want and adjust the sourness by adding more amchur powder or use lemon juice.
  • In order to make the dish still richer and tastier add nicely mashed(1/2 cup paneer) to the gravy while rajma to the spinach mixture.
  • For a Vegan version avoid cream and milk in the recipe.

Friday, August 6, 2010

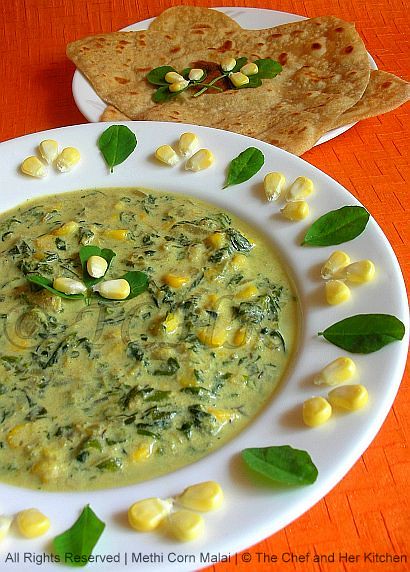
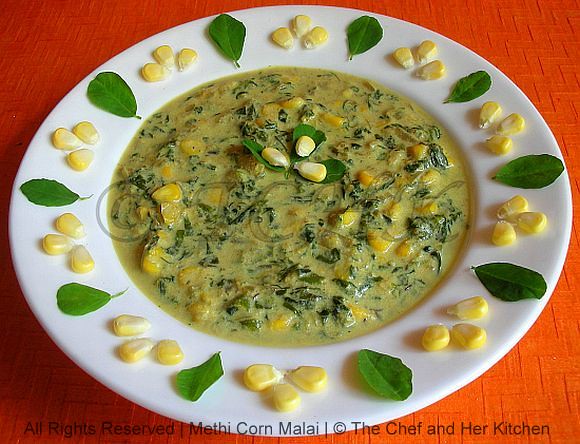
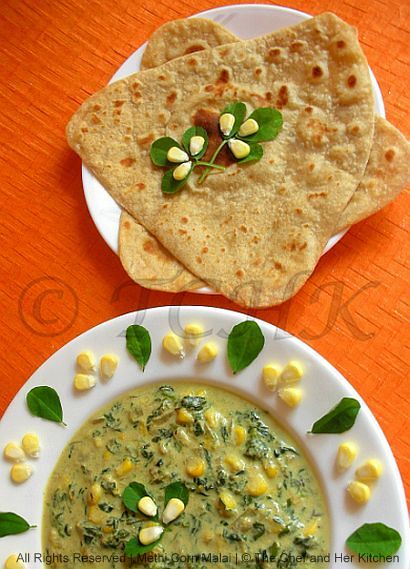
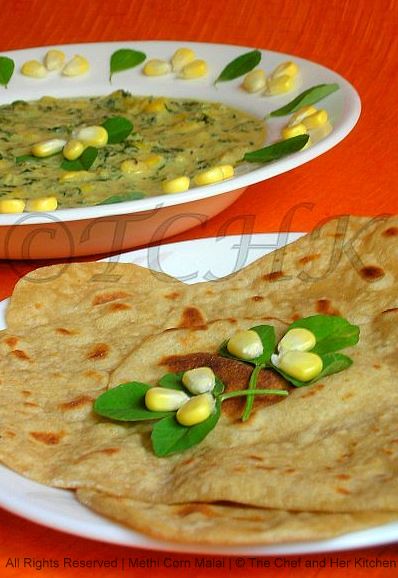
Methi Corn Malai

Who says 'NO' to the corn which is roasted on the hot coal and smeared with lime juice,salt and chili powder in this rainy season or especially near the beaches?
Fresh sweet corn is abundantly available in this season and I try including it in various items like salad's,upma,kitchdi,pulao,sabzi,snacks,sweets etc etc.
This Methi Corn Malai is very similar to the famous Methi Mutter Malai just that few more flavors are infused to complement the sweetness of corn otherwise the ingredients used to make it are almost same.I adapted this recipe from Sanjeev Kapoor's book.
This curry is even going to participate in Divya's 'Show me your curry' event.

Ingredients:

1 bunch fresh methi leaves,washed and chopped
1 cup sweet corn
1 cup fresh cream(I used 1 cup milk instead)
2 tsp Ginger-Garlic paste
1/2 tsp shahijeera/black cumin seeds
2 onions,chopped
3 green chillies,chopped
1/2 tsp amchur powder
1/4 tsp white pepper powder
1/4 tsp elaichi powder
1 tsp crushed kasuri methi
salt to taste
2 tbsp oil

Method:
  • Grind ginger and garlic to a fine paste.
  • Heat oil in a pan,crackle shahijeera.Add chopped onions and fry until translucent.
  • Add green chillies and stir fry for 10 seconds.Add ginger garlic paste and methi leaves and cook uncovered for 6-7mins.
  • Add sweet corn and cook for 3-4mins./add amchur,white pepper powder,salt and stir.
  • Add fresh cream and simmer till it reduces to half.If the gravy turns out little dry add half a cup of water to it.(I added milk instead of cream for a low fat version where as the original recipe called for cream)
  • Sprinkle crushed kasuri methi and elaichi powder and mix well.
Serve it hot woth roti's/pulao's/Naan/Kulcha.