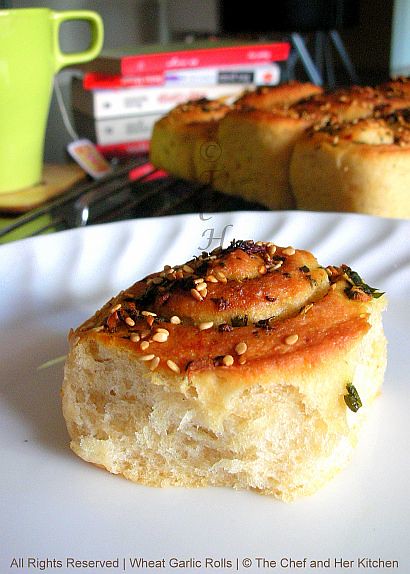
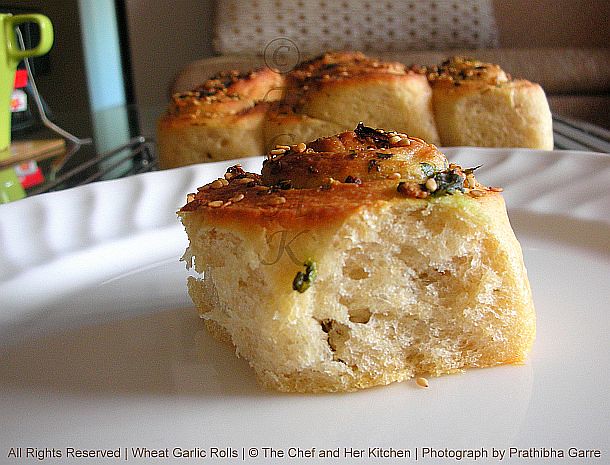
 Baking has become my latest passion and I made it a point to bake something at least once a week as both of us thoroughly enjoy freshly baked home breads.You all would have seen these garlic rolls in our friends' blogs and one among them is suhaina's space and successfully attempted by many others(I dont remember their spaces now).I have made these rolls for a couple of times following her recipe and was happy with the flavor and taste of them.This time I tried by substituting some portion of white flour with wheat flour(adapted this idea from this post of sharmis' space) and added extra herbs to the spread to make it extra more flavorful.I was really happy with the outcome of those rolls and found not much of difference in taste in spite of the addition of wheat flour.
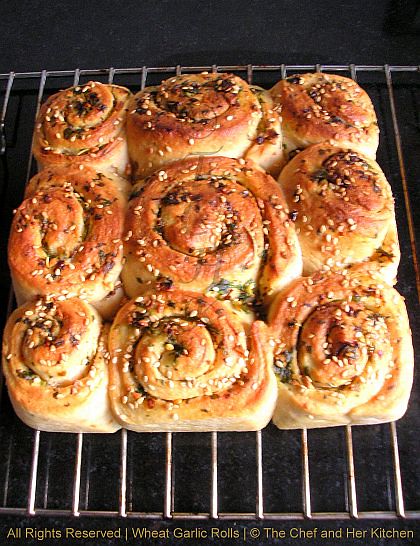 Ingredients:
1 cup whole wheat flour
1 cup all purpose flour
1 cup water
1 tsp active dry yeast
2 tsp sugar
2 tbsp extra virgin olive oil(EVOO)
for Extra touch:
1 tbsp white sesame seeds
1 tsp softened butter
for Garlic Spread filling:
2 tbsp softened butter(I used 1 tbsp butter + 1tbsp EVOO)
7-8 garlic cloves,finely chopped and crushed
2 green chilies,finely chopped
2 tbsp finely chopped coriander
1 tsp mixed Italian herbs
1 tsp red chili flakes
 Method:
- Microwave water for 30 seconds until it is luke warm to touch.Pour this into a wide bottomed bowl.
- Dissolve in the sugar and yeast in it and mix thoroughly until dissolved.Leave this aside for 15-20 mins until the yeast mixture becomes frothy.This is the important step in proceeding further to the recipe.If the yeast does not proof throw it and start the process again from the scratch.
- Stir in the olive oil and salt to the frothy yeast mixture and slowly add a cup of wheat flour and all purpose flour into it and mix well,I used a wire whisk for this purpose and mix until you get a lump of smooth dough.
- Now put some flour on the broad white board or feel free to use the well cleaned and wiped kitchen platform(like I did) and take the lump in both hands and knead the bread towards you.
- Follow the same method and knead it properly for 10 mins roughly until you get a non-sticky but still smooth dough.Add flour in between if required when the dough is sticky.Even you knead this for less time also it will still yield nice n fluffy buns.
- Now grease your hands and a empty big bowl with oil and coat the dough with oil slightly and place it in the greased bowl.Cover with a clean kitchen towel and keep it in warm place until the dough doubles almost.It takes almost one to one-and-half hours depending on the climatic conditions.I preheated my microwave for 20 seconds and kept the bowl in it.
- Cover this place of platform or the board with some cloth or paper as we need to use this place again for kneading.
- After the first rise the dough would have doubled in size,take a knife and cut into two halves(divide one into slightly bigger one).
- Now again knead the dough gently for 7-8 mins,this process is important as it assures of removing air bubbles formed in the dough.Repeat the process with the other portion as well.
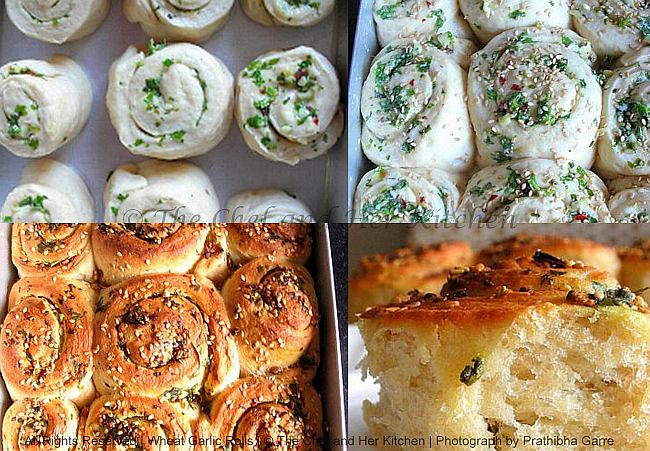
- Flatten one portion with a rolling pin to form a square of approx 1/2"thickness(say 8 or 9 inch square) and spread the garlic spread mixture in the center and roll it carefully to form a spiral.Cut into 4 portions to get 4 spirals.Repeat the process with the other portion to get 5 spirals.While rolling the dough with a rolling pin,if your dough is sticking to the rolling pin,feel free to smear the rolling pin and the dough with extra oil and try rolling.Even if you cannot acquire square shape it is fine,try making a round and apply the mixture and cut into lengthy strips and roll them.
- Place the spirals in the greased square or round pan in the required order with the cut side up.
- Keep them again in the warm place for 45 mins - 1 hour for the final rise.Mean while preheat the oven at 220 degrees for 10 mins when you are about to finish the rising time of bread.
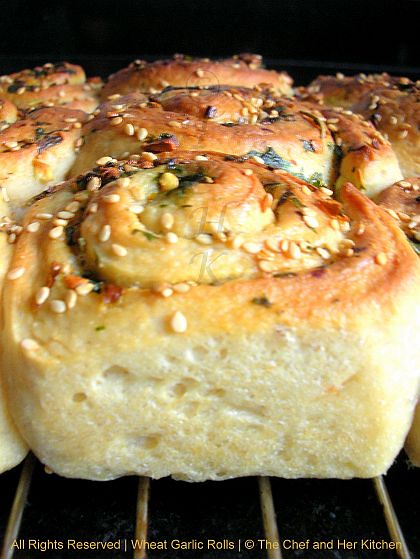
- Spread the remaining garlic spread mixture over it and brush the top of the spirals with milk very gently and sprinkle white sesame seeds over the nicely risen spirals and keep it in preheated oven and bake them at 180 degrees for 20-25 mins until the top portion of the bread turn slightly golden and the bread should sound hollow when tapped the crust with hand.If it is not,go ahead and bake for another 5-10 mins.By now your house would be filled with a very nice aroma of garlic and fresh bread.
- Brush the top of the spirals with butter immediately after removing them from oven.This helps in giving the shine to the crust and also makes the crust softer and even the smell of the bread will be nice.
- Run the knife around the edges and slowly remove the bread from the pan and let it cool on the wire rack.
Notes:(Updated)
- Do not add the frothy yeast liquid at one go,keep some portion of the liquid aside and stir in the flour,if you feel the dough is getting harder add the remaining liquid portion little by little until you get a soft dough.Or if your dough is sticky add some extra flour.
- While kneading the dough,you can add extra flour if you find the dough is very sticky.You can even smear your hand with oil and go ahead for kneading the dough.
- While rolling the dough with a rolling pin,if your dough is sticking to the rolling pin,feel free to smear the rolling pin and the dough with extra oil and try rolling.Even if you cannot acquire square shape it is fine,try making a round and apply the mixture and cut into lengthy strips and roll them.
- Using complete white flour instead of a 50:50 ratio of wheat and white flours will definitely yield softer,whiter buns.But I added in that proportion for the healthier side.But if you are trying for the first time I suggest you to try with the white flour only,as the wheat flour one's are slightly dense in texture compared to the white flour one's.
- Keep an eye while you are baking them,do a toothpick test to confirm that the bread is done.If not bake it further for another 5-10 mins until done.

I've been eyeing this on suhainas space itself and ur post tempts me more.....bookmarked to try! And thanks for adapting from my masala buns :)
ReplyDeleteHi Prathy,
ReplyDeleteLovely garlic rolls dear...I love them...:)
Dr.Sameena@
http://www.myeasytocookrecipes.blogspot.com
Its looking just too good Pratibha!! Second garlic bread on my monitor today, feel like baking something garlicky right away!!
ReplyDeleteEXCELLENT Prathibha.Its very inviting.This is a must try.The rolls have come out perfectly.Love the first pic especially. YUM
ReplyDeleteWat a cute and prefect looking garlic rolls..sooo tempting..
ReplyDeletewow that came out really very nice.pictures shows the real outcome of that
ReplyDeletewow, looks so.yummmy n perfet, so tempting ya!
ReplyDeleteahh homemade bread there is something in it...awesome work. the rolls looks so so neat.
ReplyDeletePerfectly done and nice attempt with wheat flour, would love to try this healthy version...
ReplyDeleterolls are beautifuland tempting.
ReplyDeletedar for long timeo not he
what a fantastic bread rolls.... superb clicks...
ReplyDeletetooo good!....they look absolutely tempting!...I am gonna try this for sure soon!
ReplyDeleteperfectly baked...and anything with garlic is always welcome
ReplyDeleteGorgeous and tempting rolls ya! Wonder when I'll bake my first bread/bun...hehe ;)
ReplyDeletegarlic rolls look delicious and tempting..nice
ReplyDeleteHi Prathy
ReplyDeletesimply deightful Rolls . Can you e mail me a copuple of those so that I can munch a few ;)?
Deepa
Hamaree Rasoi
Ya even I have to attempt this 50/50 ratio,looks great!
ReplyDeleteInviting rolls! Even I have bookmarked this recipe:)
ReplyDeleteHey Prathy just awesme dear.....will ging to try on thisweekend...
ReplyDeleteHi.
ReplyDeleteThe rolls look great dear.
Even I attempted making these with wheat flour and was mighty happy with the result, still in my drafts will post sometime.
FOODELICIOUS
Garlic rolls looks delicious and gorgeous. Stunning pics
ReplyDeleteLovely healthy rolls.... Nice snaps.
ReplyDeleteLovely rolls . I love the garlic butter cheese version the most . Herbs are always good to have in your bread ...i can just smell them :) ... a garlic whole wheat n barley bread has just been baked in my kitchen n the aroma is still fresh ...
ReplyDeleteEven I have tried baking garlic rolls, but yeast ditched me :( Your clicks are tempting me to attempt it again. Thanks a lot for the detailed explaination.
ReplyDeleteWow,Lovely rolls. Your pictures are very nice. Looks very tempting too. i will try this sometime and am bookmarking it right away.
ReplyDeleteBeautiful garlic bread and yah me too always add half whole wheat and Apf .. Healthy too. By the way the texture looks great.
ReplyDeleteThese buns look so good. Feel like grabbing one from the screen :-)
ReplyDeletethose pics are tempting me to eat garlic bread. liked you recipe, will make this weekend.
ReplyDeleteFirst time on your blog and following u. :)
http://subhiksa.blogspot.com/
They look super duper soft and fluffy..awesome job here!
ReplyDeleteUS Masala
wow!!looks veryyyy soft and perfect...really healthy one!
ReplyDeleteTried the garlic rolls as the temptation was too much but i found the dough very sticky and wet so had to had add about 1cup extra flour Where have i gone wrong?
ReplyDeleteHi Anonymous,
ReplyDeleteAs I mentioned in the method there is no harm if you add extra flour while kneading to get a soft and pliable dough,the amount of water I mentioned was enough for me and at max I used 1/4 cup of extra flour while kneading as I used extra fibre wheat flour which took most of the water I think.You can even smear some oil over your hands while kneading which yields the process of kneading and while rolling into spiral.But u were able to make the rolls or not?
If you have tried how they turned out?
I will update some tips in my post...Might b that will help you.
rgds,
prathibha
love garlicky food, these rolls are so inviting.
ReplyDeletewow. the rolls have come out well.. thanks for trying my recipe dear.. i feel proud.I like ur spicy touch too for the spread... nice clicks too.
ReplyDeleteHappy to follow u dear..
so yummy they were no! :)
ReplyDeleteWhoa, they looks simple superb, I bookmarked :)
ReplyDeleteyummy..
ReplyDeleteHi Prathy! Thanks for sharing this recipe. You have a very nice blog!
ReplyDeleteI made these today and just removed them from the oven; the house smells glorious :)
However, the breads didnt come out looking quite right. The dough rose beautifully at the first rise. But, I didnt know how large the rolled-out square should be, and I ended up with a thin, long, stuffed roll. I cut it into 5 pieces like you said, but since they were long and thin pieces, I couldn't lay them cut-side up. So I placed them on their sides, and they've turned out into flat spirals :(
I will try this recipe again cos I'm sure it tastes delicious. I would love if you could specify the dimensions of the rolled-out square and confirm if the butter to be used is unsalted.
Thanks a bunch!
Hi Jolene, Thanks for letting me know about this,I have updated it in the recipe.Basically you need to roll around 1/2" thickness square,it would be like 8 or 9 inch square.You can cut them into 1 1/2" inch wide strips.I hope this would help u..if you have any doubts still please lemme know,I would be happy 2 share.
ReplyDeleteThanks very much for the reply and dimensions. The breads were delicious, and I'm going to make them again (rolling out the dough to the right size, this time) :)
ReplyDeletefew more pics please.. i am not able to picture spreading the garlic and doing the spiral.
ReplyDeleteWe have made this a couple of times now, the first time i followed the recipe and it turned out fabulous. The second time we made it, i replaced the Italian herbs with a ton of toasted curry leaves and increased the qty of Cilantro. It tasted fabulous as well and reminded me of good old Khara bun.
ReplyDeleteMade this. It was lovely. Thanks
ReplyDelete