Friday, December 31, 2010

Hosting my First Event - 'Only' Salads

I am about to complete over two years of blogging but I have never hosted any event so far in my blog.When Pari of Foodelicious approached me to host her event,I was really excited as it is my first time experience.The fact that it is a healthy event adds to the excitement.
So,here I announce my first ever event - 'ONLY' SALADS started by Pari Vasisht of Foodelicious,who has a wonderful collection of yummy recipes in her blog.I really like the passion that reflects in each and every dish she has posted.

Now coming to the details.This event has two giveaways.
1.The first giveaway is from the CSN stores for US/Canada/Germany and UK readers.Check out Pari's space for more details of the give away.
2.The second giveaway is exclusive for Indian readers from the well known Indian cook book author Tarla Dalal's 'Healthy Soups and Salads'.You can also visit her website http://tarladalal.com/ for interesting recipes.

When pari gave me the options to choose the event I chose her Only Salad's event as I believe that it is a very healthy event and it would be a great experience for me to learn different kinds of salads.

Winters are the best time to get fresh greens and vegetables in abundance and is the best time for making tasty salad's.It is very important to include salad's in our regular diet as the greens and vegetables are used in larger proportions which helps in supplementing necessary vitamins, minerals, nutrients,dietary fibers to our body.In short,we can say 'A Salad a day keeps the doctor away'.
Salad's are very versatile and can be made with a wide variety of ingredients like whole grains, legumes, vegetables, greens,pasta,fruits,eggs,croutons and nuts.Salad's can be served as an appetizer or a main dish or a fruit salad as a dessert in a meal.One can be innovative to use the various ingredients and dressings to make a salad with attractive toppings like nuts,fruits and croutons.

This is the beautiful Logo designed by Pari for the event.

I will try posting this month various salad recipes for the event.To start up check out few salad recipes in my blog which I have posted earlier .
  1. Wheat and Jowar whole grains salad
  2. Tomato Lettuce Salad
  3. Fattoush...Lebanese Salad
  4. Moong sprouts Salad
  5. Cous Cous Salad
Rules for the event:

1. Any number of fresh entries can be sent but only 2 entries from the archive will be accepted. Archived entries to be re posted, else will not be accepted.
2. Only vegetarian entries (eggs allowed) will be accepted.
3. Use of logo is compulsory/mandatory as it helps to spread the word.
4. The entry should be linked back to this event announcement and Pari's event announcement page.
5. The winner of the book will be chosen by me using random.org.
6. The CSN winner will be chosen by Pari Vasisht from the comments, name and links left in her event announcement page.
7. Format of entry
- Name
- Blog Name
- Blog URL
- Recipe name
- Recipe link
- Pic resized to 300 pix
- Country
7. Roundup will be posted in 1st week of Feb 2011 unless any emergency situation.
8. Guest Host cannot win the giveaway.
9. Non bloggers can also participate, by sending entries by email to thechefandherkitchen@gmail.com with or without photograph.
10. Disclaimer - CSN giveaway is only for US/Canada/UK and Germany entries and 2nd giveaway is for entries from India.

Feel free to contact me regarding the event details or any other information required.I expect your maximum support and participation in this event to make my event successful.

Tuesday, December 28, 2010

Coconut Choco Truffles...completely Indianized !!!!

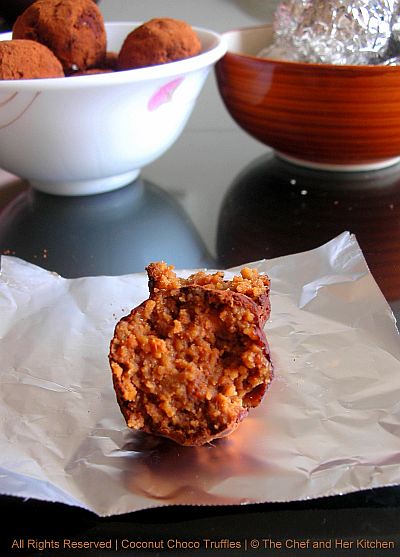
I am back from my vacation and I hope that every one is enjoying the most joyful holiday week of the year with Christmas and New year celebrations.Even I had a wonderful holiday and got to spend good two weeks away from my regular house chores and cooking. And now coming to the description of how this Indianized truffles evolved.Before I was leaving I was on kitchen cleaning spree and was left with a small coconut.I initially thought of making the regular coconut burfi / kopra pak with it and when I was talking to my mom about this she suggested me to try coconut burfi by adding cocoa powder.I preferred to make this with jaggery instead of sugar to get the natural brown color to it and when I was making the burfi,somehow the idea of Truffles stuck in mind and I was very excited about the idea of turning the burfi to truffles.To my surprise they turned out too good,they were chewy and the bite through the cocoa powder takes the regular coconut balls to a completely different level.On the whole I really enjoyed making them and packing them in wrappers and these Indianized truffles can also be given as a christmas/festive gift and is apt for the season now.

Ingredients:
2 cups heaped grated fresh coconut
1 1/2 cups Jaggery or Sugar
1 tbsp cocoa powder
1/2 tsp cardamom powder

3 tbsp chopped cashewnuts
3 tbsp ghee

for dusting:
2 tbsp cocoa powder
1 tbsp icing sugar

Method:
  • Grate the coconut carefully,scrape only the white part leaving the brown edges behind.
  • Heat 1 tbsp ghee in a small pan and add chopped cashew nuts and fry until light brown in color.
  • Place Jaggery with 1-2 tbsps of water/milk in a thick wide bottomed vessel on medium heat and let it come to boil.Let the jaggery dissolves completed and blends well with milk and forms syrupy liquid(to reach one-string consistency).The process of achieving string consistency syrup liquid is important in order to get a tasty sticky truffle.
  • Now add grated coconut,fried cashewnuts,elaichi powder and 3 tbsp ghee to it and stir well.Let it cook by stirring it constantly until the edges of the mixture in the vessel is bit dry and flaky.It approximately takes 10-12 minutes.
  • Switch off the flame and add cocoa powder and mix quickly and let it cool down a bit.
  • Mean while mix cocoa powder and icing sugar and sieve it onto a wide plate to get a uniform mixture.
  • Now take a small portion of the coconut mixture and make a ball out of it.Repeat the process to make all the remaining balls.
  • Roll them in the cocoa powder mixture and place them on a dry plate and let them set for 30 mins to one hour.
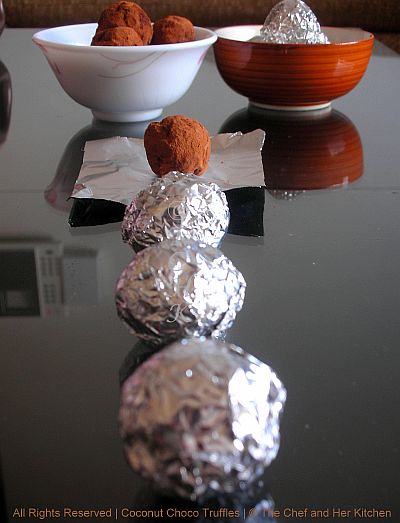
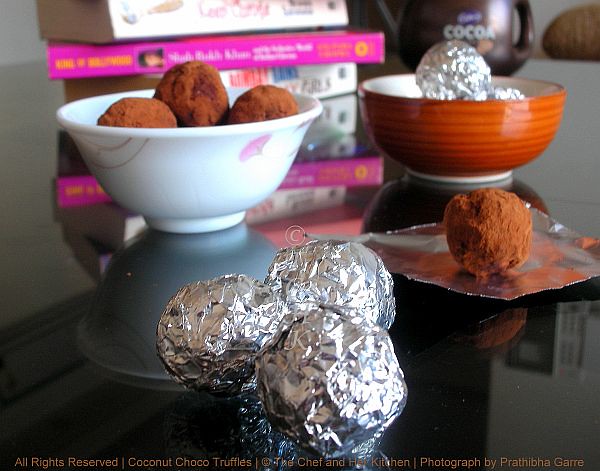
  • Now pack them in colorful chocolate wrappers,I packed mine in small pieces of aluminium foil as I did not have chocolate wrappers at that time.
Store it in air-tight containers and eat them at any time of the day as a simple sweet/dessert/snack. They stay good for 4-5 days outside and upto 15-20 days when refrigerated.I am sure that they will not last that longer,they are surely irresistible and would be over within 2 days.

Monday, December 6, 2010

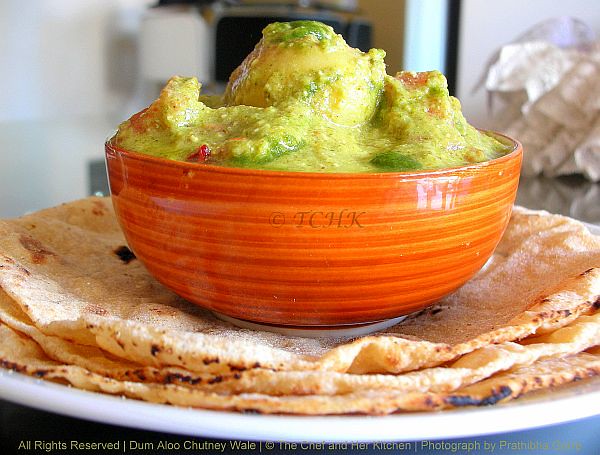
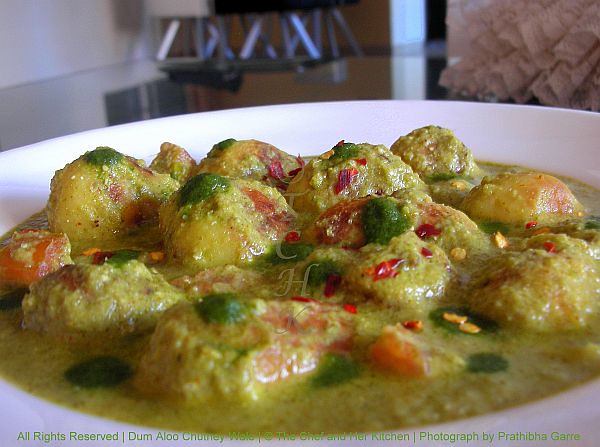
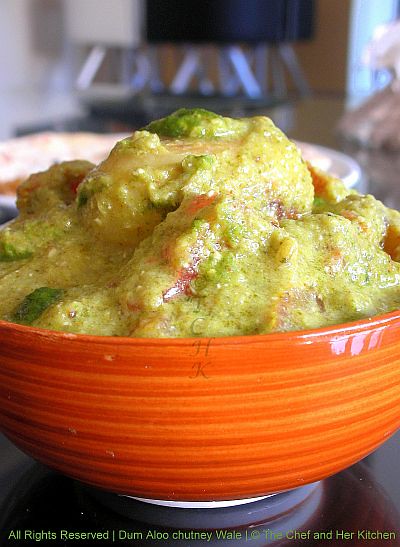
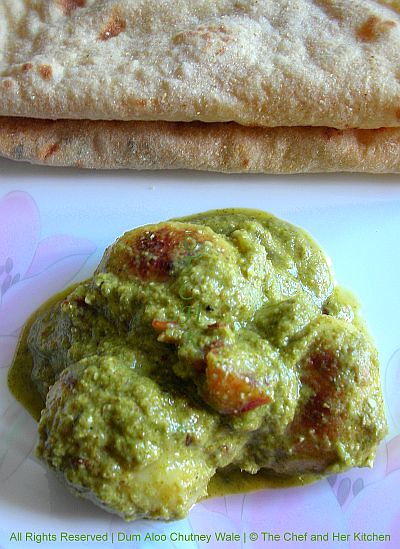
Dum Aloo Chutney Wale

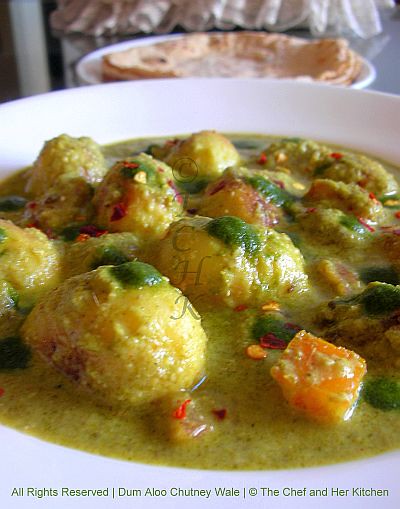
I have already posted a recipe for Dum Aloo here,but this version is quite different from the regular Dum Aloo recipe.The addition of ground mixture of greens,sourness from the beaten yogurt,richness from magaz paste,dum cooking takes the taste of this curry to a different level and is really a great party recipe.One should follow some critical tips while cooking the gravies based with curds or milk,if we do not follow them we will end up having curdle mixture.The entire process of cooking this gravy is done without closing the lid and cooked over a low flame in order to retain the green color of the gravy.Try it once and I am sure you will definitely love it.

(Recipe Source : Nita Mehta)
Ingredients:


10-12 baby potatoes or 3 big potatoes,cut into 4 pieces

for chutney:
1 cup fresh coriander
1/2 small raw mango or 1/2 tsp amchur powder
1/2 cup mint
4 green chillies
1/2 tsp salt
1/2 tsp sugar

for gravy:
4 tbsp oil(I used just 1 tbsp oil)
2 onions,ground to paste
1 tbsp Ginger-Garlic paste1 tsp cumin seeds
1/2 tsp red chili powder
1 cup yogurt beaten,mix with 1 1/2 cups of water
2 tbsp cashewnuts or 1/4 cup magaz seeds(watermelon seeds)
1 tomato,finely chopped
1/2 tsp Garam masala
salt to taste


Method:
  • Wash potatoes and pressure cook for 1 whistle and peel them.The original recipe asked for deep frying the peeled potatoes with out cooking them.But I shallow fried them in a spoon of oil until brown by turning them over in between.
  • Grind the ingredients mentioned under the section chutney to a smooth paste.
  • As I used magaz(watermelon) seeds,I ground them with 4 cashew nuts to a smooth paste using little water.The original recipe called for only cashew nuts but I like the special taste of magaz seeds in the gravy.
  • Beat yogurt properly and mix with the ground magaz/cashew nut paste and keep it aside.
  • Heat oil in a kadai,add onion paste and fry until the oil leaves the masala.
  • Add jeera and stir fry for a minute.
  • Add ground chutney and red chili powder and stir for a minute.
  • Remove the kadai from fire and keep it aside for a minute.Add yogurt-cashew nut/magaz mixture and stir it and keep it back on the flame.Stir continuously and cook over a low flame till it comes to boil.This step is critical,if you do not do it carefully you will end up having curdle mixture.Do not cover kadai while cooking this.
  • Now add the fried potatoes and salt.Simmer uncovered for 5 mins until oil leaves the masala and gravy thickens.
  • Add finely chopped tomatoes and garam masala and stir well and bring to a boil.
Serve it hot with Roti/Naan/Kulcha/Jeera rice/Biriyani.

Note:
Do not cover the kadai with lid while cooking the gravy as it changes the lovely green color of the gravy.


This is again going to participate in Sara's "Only Greens" event started by Pari of Foodelicious.
clip_image003[8]
I am going on a vacation and would be away for two weeks from blogging.I will try peeping into your blogs whenever I get a chance,but I apologize as I would not be commenting to your wonderful posts.I will see you guys only after christmas.

Thursday, December 2, 2010

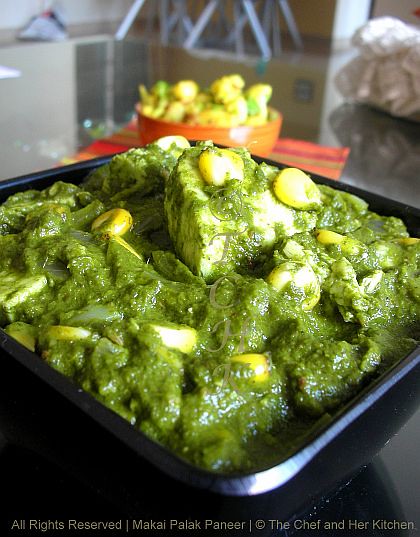
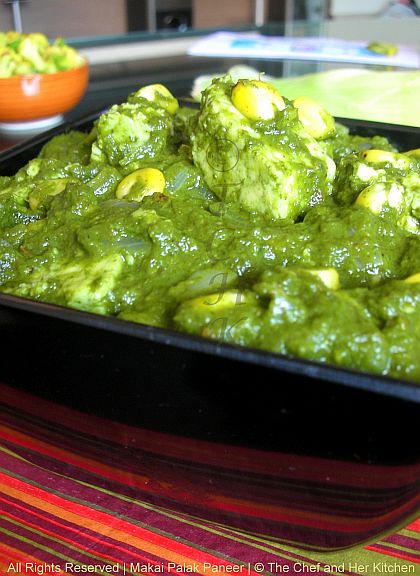
Makai Palak Paneer...Grilled Corn Palak Paneer

I can't stop myself to buy when I see fresh corn in the market.I love to grill it and eat it hot and spicy with fresh lime and masala smeared all over it.One corn was left over in the refrigerator untouched after having a over dose of grilled corn.So,thought of using it in a curry and as I had spinach in hand thought of mixing them both.I actually grilled the corn and marinated it with lemon and salt and the idea actually worked,it gave a nice taste to the corn in the curry.As I had only one corn I even added paneer to make it sufficient for both of us.The crunchiness and tangyness of corn in each and every bite is really amazing and I just loved it.

Ingredients:
250 gms Homemade Paneer (or store bought),cubed
1 regular fresh corn
1 big bunch spinach
1 big onion,diced
1 medium onion,finely chopped
2 tsp Ginger-Garlic paste
4-5 green chillies
2 tsp coriander powder
1 tsp roasted cumin powder
1 tsp Garam masala
a pinch of sugar
1/2 tsp kasuri methi(optional)
1/2 tsp amchur powder
2 tbsp fresh cream(or 1/4 cup milk)
salt to taste
juice of 1/2 lemon
1/2 tsp cumin seeds
1 tbsp butter
1 tbsp oil

Method:
  • Boil water in a big pot and add cleaned spinach leaves and whole green chillies and blanch for a minute.Add a pinch of sugar while blanching it in order to retain the green color of spinach.Strain the spinach(save the water to dilute the gravy later) and quickly run the blanched spinach under running water and squeeze out extra water.You can even saute the spinach but you should be really quick in doing it otherwise you will loose the beautiful green color of spinach.
  • In that hot water(in which we blanched the spinach)soak the paneer cubes until its uasge.This way the paneer will be soft.
  • Grill the corn on the flame until light black spots appear all over the corn.Quickly rub it with lemon wedge dozed with salt all over the corn and let it marinate for some time,aproximately 10 mins.Take a knife and cut the corn to get the corn kernels.
  • Grind diced onion with ginger and garlic paste and keep it aside.
  • Grind the spinach and green chillies to a fine paste.Open the mixer and keep it,otherwise it will change the color.
  • Heat oil and butter in a big kadai and crackle cumin seeds,add finely chopped onions and fry until translucent and add ground onion mixture and fry well.
  • Add coriander powder,cumin powder,amchur powder,slightly crushed kasuri methi and mix well.
  • Add spinach puree and cook over medium flame.Add salt,grilled corn kernels,paneer cubes(slightly squeeze them after removing from hot water) and garam masala and mix well.If required add the strained water to dilute the gravy to get the required consistency and ook for 2-3 minutes.Do not cover the kadai while you are cooking,otherwise you will loose the green color of spinach.
  • Add cream(or milk) and mix well and cook for a couple of minutes and remove it from stove.Add lemon juice and give a quick stir.
Serve it hot with roti/kulcha/naan/jeera rice.

Note:
  • You can just make this with grilled corns and call it Grilled Corn Palak or you can use only paneer and call it Palak Paneer as the recipe is almost same for both of them.
  • I do not add tomato in any of the spinach based dishes as I some how believe the combination of spinach and tomato leads to the formation of stones in kidney.So I avoid tomato and use instead amchur powder or lemon juice for the sourness.
This is going to participate in Sara's "Only Greens" event started by Pari of Foodelicious.

Check out other Paneer recipes in my blog:
  

Monday, November 29, 2010

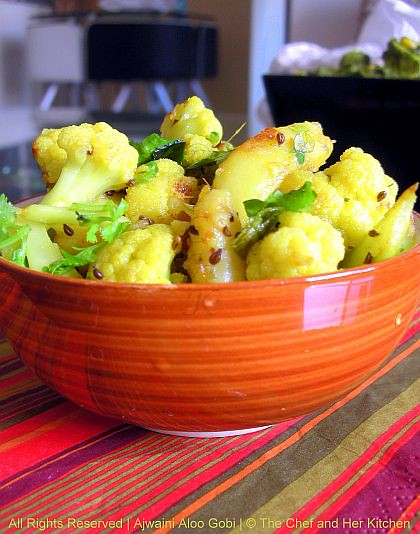
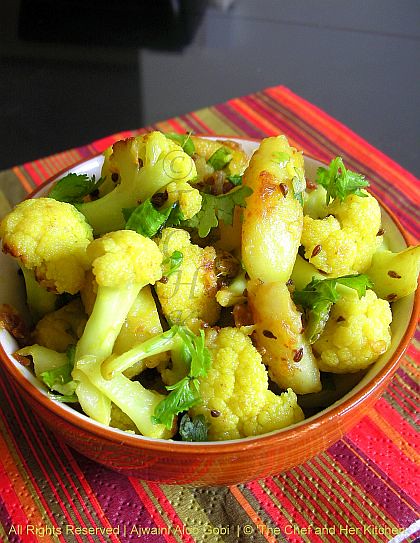
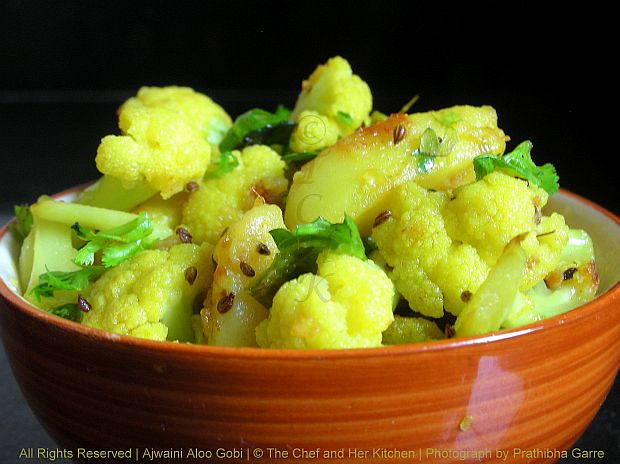
Ajwaini Aloo Gobi with Mustard flavor...Simplicity at its best!!


I can confidently say that this is the
BEST Gobi Sabzi I have ever had as it is loaded with simple but amazing burst of flavors.
Now let me tell you where I got the recipe from,during one of my usual morning walks with a neighbor,I told her that I m really bored of eating the same old regular gobi sabzi (as I was actually planning to make it for lunch)and asked her if she has anything interesting recipe with it.I was sure that she would be certainly having an interesting recipe with it as I had tasted her food before and loved it very much(did I say that,that lady is from punjab? and do I need to say anything about the punjabi's love for food?).She happily shared me this recipe and also mentioned the key points of the recipe which I found really interesting like "burning the mustard oil ","ajwain flavor","no onion,no garlic,no tomato","flavorful crispy gobi",'lots of coriander".Those were the words which were actually flickering in my mind after I finished my walk and decided to make it immediately following her words and recipe exactly.I must admit that this is the
best Gobi Sabzi I have ever had as it is loaded with simple but amazing burst of flavors.You might be wondering why I am boasting about such a simple recipe,you need to try this recipe to believe my words.Sometimes the simple sabzi's turn out better and tastier than a rich gravy based one's.I highly recommend you to try this once to believe my words.Now lemme stop my bla bla.. and share you the recipe which I was boasting upto now.


Ingredients:
1 small phool gobi/cauliflower,cut into small florets
2 medium potatoes,peeled and sliced/diced to the size of gobi florets
1" ginger,finely chopped or grated
4 green chillies,finely chopped
2 tbsp chopped fresh coriander
2 tsp ajwain(compulsory)

1/4 tsp turmeric powder

1 tsp Garam masala
1/2 tsp lemon juice

salt to taste
2 tbsp mustard oil(compulsory)


Method:
  • Cut gobi and potato into equal size pieces.
  • Par boil potato cubes in salted water until half cooked.Remove them and keep aside.Blanch the gobi florets in the same water and keep it separately.I even added a pinch of turmeric powder in the water while boiling the vegetables.
  • Heat mustard oil in a thick narrow bottomed kadai until it really reaches the SMOKING point and you can see fumes coming out,the oil should literally burn to get the amazing and special flavor to this curry.This is the most important step while making this curry.
  • From now the real action begins you should be really quick in adding the ingredients to the hot oil.Keep the flame in medium now.
  • Add turmeric to the burning oil and immediately add ajwain and crackle it.Add finely chopped and grated ginger to it and quickly saute it.Do not burn any of the spices.
  • Add finely chopped green chillies and again saute for a minute.
  • Add the par boiled potatoes and fry them until you see the brown specs appear on them.You can do this part over the high flame.
  • Now add the cauliflower florets and continue frying it on medium to high flame until you see the brown specs appear on all the vegetables and are cooked and yet crispy.
  • Now add garam masala and chopped coriander to it and mix well.Mix in the lemon juice and remove it from stove.
Serve it hot and fresh to enjoy the flavors and the crispiness of the vegetables in it with roti/Naan/Kulcha/Rice.

Note:
You can make it only with cauliflower avoiding potatoes in the recipe.Even that turns too good.

Thursday, November 25, 2010

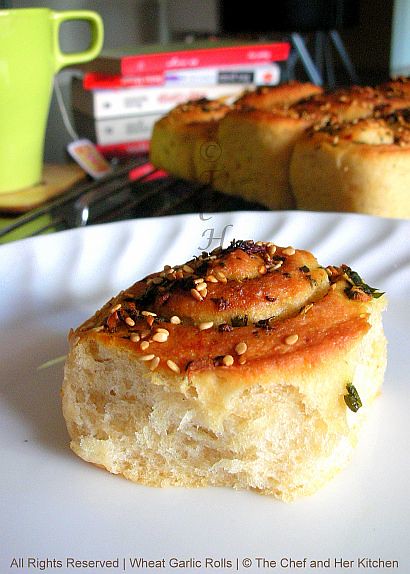
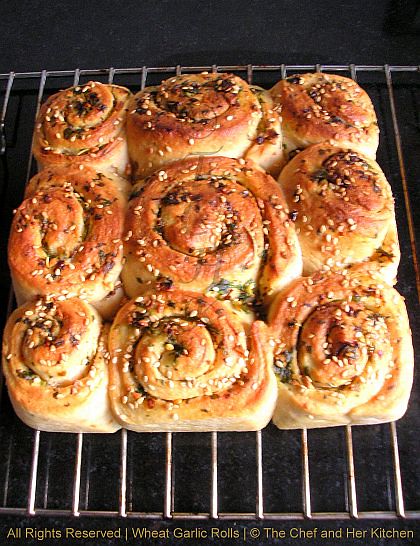
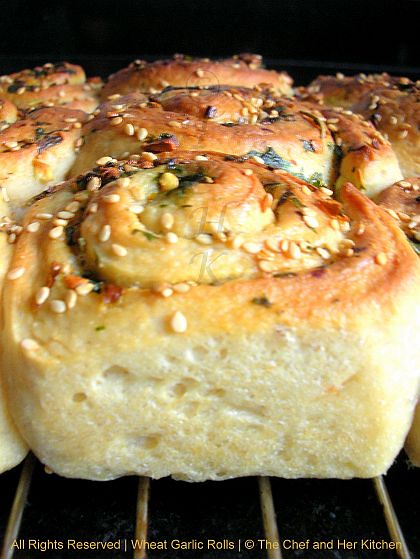
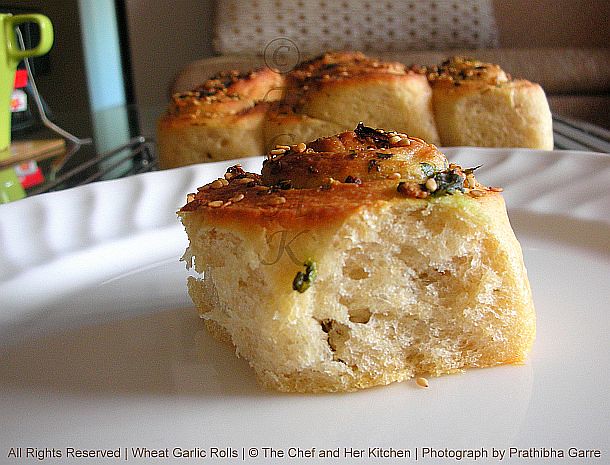
Whole Wheat Garlic and Herb Rolls...healthier version!!

Baking has become my latest passion and I made it a point to bake something at least once a week as both of us thoroughly enjoy freshly baked home breads.You all would have seen these garlic rolls in our friends' blogs and one among them is suhaina's space and successfully attempted by many others(I dont remember their spaces now).I have made these rolls for a couple of times following her recipe and was happy with the flavor and taste of them.This time I tried by substituting some portion of white flour with wheat flour(adapted this idea from this post of sharmis' space) and added extra herbs to the spread to make it extra more flavorful.I was really happy with the outcome of those rolls and found not much of difference in taste in spite of the addition of wheat flour.

Ingredients:
1 cup whole wheat flour
1 cup all purpose flour

1 cup water
1 tsp active dry yeast

2 tsp sugar
2 tbsp extra virgin olive oil(EVOO)

for Extra touch:

1 tbsp white sesame seeds
1 tsp softened butter

for Garlic Spread filling:
2 tbsp softened butter(I used 1 tbsp butter + 1tbsp EVOO)
7-8 garlic cloves,finely chopped and crushed
2 green chilies,finely chopped
2 tbsp finely chopped coriander
1 tsp mixed Italian herbs

1 tsp red chili flakes


Method:
  • Microwave water for 30 seconds until it is luke warm to touch.Pour this into a wide bottomed bowl.
  • Dissolve in the sugar and yeast in it and mix thoroughly until dissolved.Leave this aside for 15-20 mins until the yeast mixture becomes frothy.This is the important step in proceeding further to the recipe.If the yeast does not proof throw it and start the process again from the scratch.
  • Stir in the olive oil and salt to the frothy yeast mixture and slowly add a cup of wheat flour and all purpose flour into it and mix well,I used a wire whisk for this purpose and mix until you get a lump of smooth dough.
  • Now put some flour on the broad white board or feel free to use the well cleaned and wiped kitchen platform(like I did) and take the lump in both hands and knead the bread towards you.
  • Follow the same method and knead it properly for 10 mins roughly until you get a non-sticky but still smooth dough.Add flour in between if required when the dough is sticky.Even you knead this for less time also it will still yield nice n fluffy buns.
  • Now grease your hands and a empty big bowl with oil and coat the dough with oil slightly and place it in the greased bowl.Cover with a clean kitchen towel and keep it in warm place until the dough doubles almost.It takes almost one to one-and-half hours depending on the climatic conditions.I preheated my microwave for 20 seconds and kept the bowl in it.
  • Cover this place of platform or the board with some cloth or paper as we need to use this place again for kneading.
  • After the first rise the dough would have doubled in size,take a knife and cut into two halves(divide one into slightly bigger one).
  • Now again knead the dough gently for 7-8 mins,this process is important as it assures of removing air bubbles formed in the dough.Repeat the process with the other portion as well.
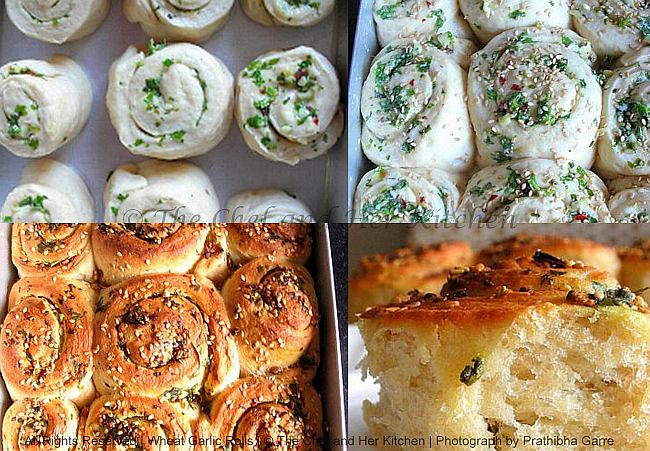
  • Flatten one portion with a rolling pin to form a square of approx 1/2"thickness(say 8 or 9 inch square) and spread the garlic spread mixture in the center and roll it carefully to form a spiral.Cut into 4 portions to get 4 spirals.Repeat the process with the other portion to get 5 spirals.While rolling the dough with a rolling pin,if your dough is sticking to the rolling pin,feel free to smear the rolling pin and the dough with extra oil and try rolling.Even if you cannot acquire square shape it is fine,try making a round and apply the mixture and cut into lengthy strips and roll them.
  • Place the spirals in the greased square or round pan in the required order with the cut side up.
  • Keep them again in the warm place for 45 mins - 1 hour for the final rise.Mean while preheat the oven at 220 degrees for 10 mins when you are about to finish the rising time of bread.
  • Spread the remaining garlic spread mixture over it and brush the top of the spirals with milk very gently and sprinkle white sesame seeds over the nicely risen spirals and keep it in preheated oven and bake them at 180 degrees for 20-25 mins until the top portion of the bread turn slightly golden and the bread should sound hollow when tapped the crust with hand.If it is not,go ahead and bake for another 5-10 mins.By now your house would be filled with a very nice aroma of garlic and fresh bread.
  • Brush the top of the spirals with butter immediately after removing them from oven.This helps in giving the shine to the crust and also makes the crust softer and even the smell of the bread will be nice.
  • Run the knife around the edges and slowly remove the bread from the pan and let it cool on the wire rack.
Now pull your buns and enjoy them as a snack with a cup of coffee/tea or a whole meal with a hot bowl of soup.


Notes:(Updated)
  • Do not add the frothy yeast liquid at one go,keep some portion of the liquid aside and stir in the flour,if you feel the dough is getting harder add the remaining liquid portion little by little until you get a soft dough.Or if your dough is sticky add some extra flour.
  • While kneading the dough,you can add extra flour if you find the dough is very sticky.You can even smear your hand with oil and go ahead for kneading the dough.
  • While rolling the dough with a rolling pin,if your dough is sticking to the rolling pin,feel free to smear the rolling pin and the dough with extra oil and try rolling.Even if you cannot acquire square shape it is fine,try making a round and apply the mixture and cut into lengthy strips and roll them.
  • Using complete white flour instead of a 50:50 ratio of wheat and white flours will definitely yield softer,whiter buns.But I added in that proportion for the healthier side.But if you are trying for the first time I suggest you to try with the white flour only,as the wheat flour one's are slightly dense in texture compared to the white flour one's.
  • Keep an eye while you are baking them,do a toothpick test to confirm that the bread is done.If not bake it further for another 5-10 mins until done.

Monday, November 22, 2010

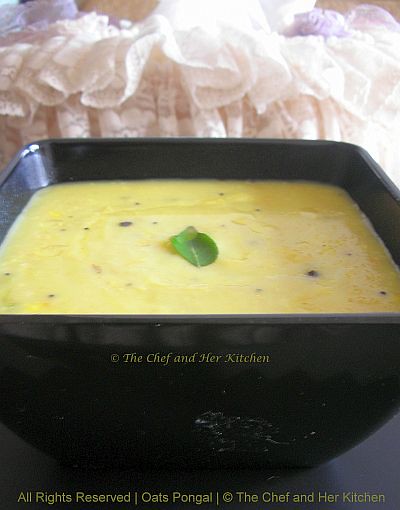
Oats Khara Pongal | Indian Oats Recipes


When I posted 'Savory Oats Porridge' previously many of you liked it and even tried at home and are happy with the results.Apart from that,I do a lot of savory versions of oats porridge's to give my family a healthy start of the day.Oats pongal is one among them which is very easy to make and is very tasty to eat.I prepare this in a way very much similar to our beloved south Indian style pongal and there is no compromise in taste as well.If you are looking for a healthy breakfast this recipe is for you,add this to your menu definitely.

Ingredients:
1 1/4 cup quick cooking Oats
3/4 cup yellow moong dal
6-8 cashew nuts,broken
8-10 peppercorns,slightly crushed
1/2" ginger,finely chopped
3-4 green chillies,slit
8-10 curry leaves
1/2 tsp mustard seeds
a pinch of turmeric
1 tsp jeera
few pinches of hing
1 tbsp ghee
2 tsp oil
salt to taste

Method:
  • Heat ghee and oil in a thick bottomed pan or small pressure cooker.Add broken cashewnuts and fry until light golden in color and remove them from oil using a slotted spoon.
  • In the remaining oil,crackle mustard seeds,jeera and add slit green chillies,ginger and fry until they wilt.
  • Add curry leaves,hing and fry slightly.
  • Add yellow moong dal and fry until you get a nice aroma and is light golden brown in color.
  • Add four cups of water and cook until the moong dal is cooked and soft.If you are using pressure cooker,pressure cook it for 4 whistles.
  • Add enough salt,pinch of turmeric and oats and stir well.cover it and cook it on low flame for 8-10 mins until everything is well mixed.If you feel the consistency is slightly thicker add some milk or water at this stage to get the desired consistency.
  • Add the fried cashew nuts and mix well.
Serve it piping hot with Coconut chutney/Sambar/ Tamarind gojju with some extra ghee on top.Eat this right away and do not keep it for long as the oats starts becoming sticky later.

Thursday, November 18, 2010

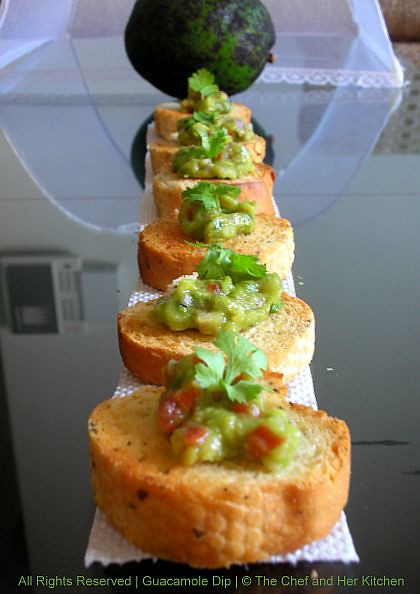
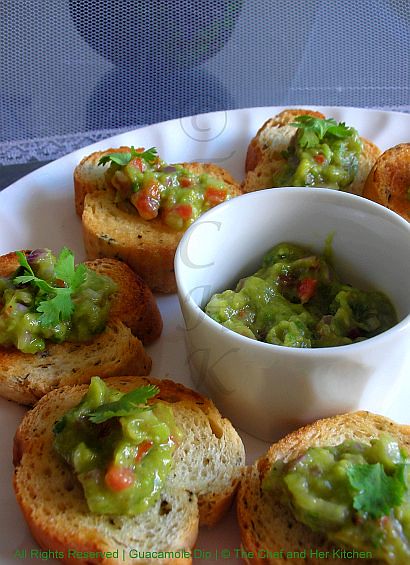
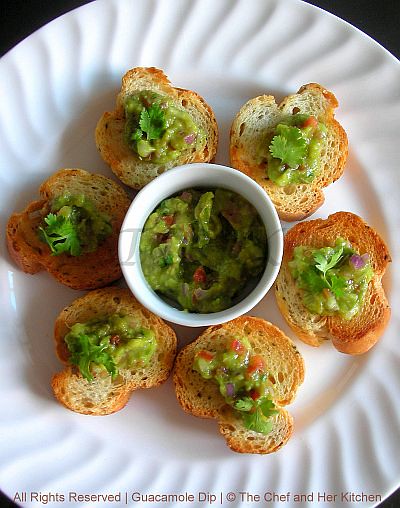
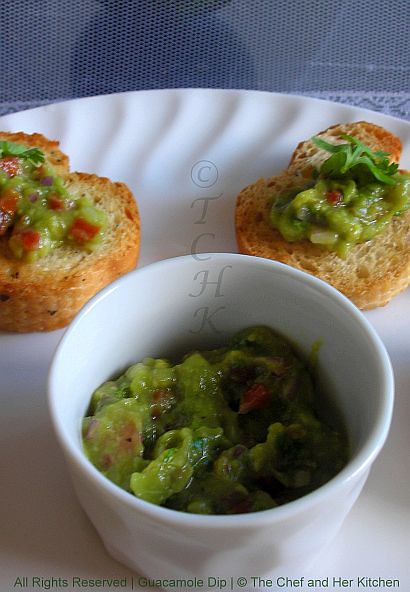
Guacamole...famous Mexican Dip!!

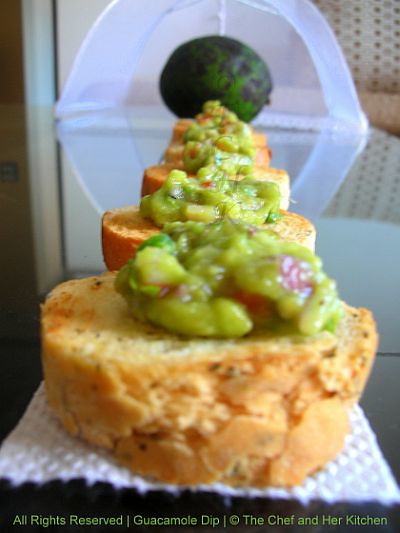
Guacamole is a famous Mexican dip/spread which is generally served with corn chips, Quesedilla's and many more Mexican varieties.Even though I use avocado in many recipes like milkshake,roti's etc,my husband never likes to take it as he does not like the buttery flavor of it and guacamole is the only form of avocado which he thoroughly enjoys without complaining.Guacamole is a versatile dip with tortilla chips/nachos/potato chips/match stick cut vegetables like cucumber,carrot,blanched peppers or you can even spread it on toast/garlic bread/sandwiches.Here comes the recipe.

Ingredients:
1 big ripen avocado
2-3 small shallots,finely chopped

1 medium tomato,seeded and finely chopped

1 pod garlic,grated
2 tbsp freshly chopped coriander
1 green chili or Jalapeno chili,finely chopped

1-2 pickled jalapenos,finely chopped

juice of 1/2 lemon

salt to taste

pepper to taste(optional)


Method:
  • Cut the avocado lengthwise and discard the big seed in between and scoop out the flesh using a spoon.Using a fork slightly mash it to get a slight chunky mixture.
  • Now add finely chopped shallots,tomato,coriander,green chili,jalapenos and grated garlic to it and mix.You can even blend them in whipper mode or you can leave it chunky.
  • Add salt,pepper and lemon and mix well.
  • Chill it in refrigerator for a couple of hours which helps the flavors to blend well.
Serve it as a dip with tortilla chips/nachos/potato chips/match stick cut vegetables like cucumber,carrot,blanched peppers or you can even spread it on toast/garlic bread/sandwiches.

Monday, November 15, 2010

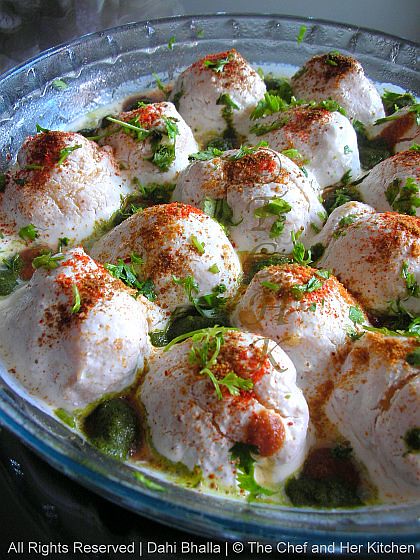
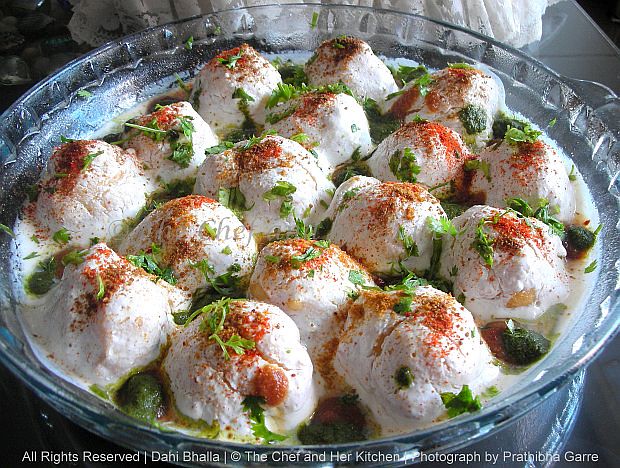
Dahi Bhalla...North Indian Street Food

I tasted this for the first time at my friend's place long back after my marriage and I just loved the taste instantly.From then I also started making it regularly at my place along with the south Indian style Dahi vada's.Even though the preparation process is quite similar to our beloved south Indian dahi vada,the additional spices and the spicy,tangy chutney's add a real distinct flavor and taste to it which is no less than any other our favorite street chaat's.This is a great party appetizer as it can be prepared well in advance and is quite soothing.If you are interested in south Indian dahi vada,check our my version here.
Ingredients:
For Urad Fritters/Bhalla's:
1 cup whole white urad dal
15-20 raisins

salt to taste
oil to deep fry


for Dahi mix:
3 cups fresh curds
1 tsp sugar
3/4 tsp black salt/kala namak
1/2 tsp red chilli powder
1/2 tsp roasted cumin powder
a pinch of salt
a pinch of hing

Meetha(Imli) Chutney:
200 gm Tamarind
2 cups dried Dates(Kharjur),finely chopped

1 cup Jaggery
1 tsp red chili powder

1 tsp
Garam masala
1 tsp Black salt
1 tbsp roasted cumin powder

salt


Green chutney:
1 Bunch of Coriander leaves
1 Bunch of Mint leaves

10-12 green chillies

1" Ginger

Juice of 2 lemons

2-3 tbsp sugar
salt to taste

To garnish:
1 tsp red chilli powder
1 tsp roasted cumin powder
1 tsp chaat masala

1/4 cup very fine sev
2 tbsp chopped coriander
1/2 tsp finely chopped ginger or julienned

Imli chutney
Green chutney

Method:

Imli Chutney:
  • Clean the tamarind and soak in water for sometime(approx half an hour) and boil it for 10-12 mins until soft.
  • Cool the mixture and take the pulp out of it. Add Jaggery and Kharjoor to it and boil until it is soft and all the jaggery melts and forms a syrupy liquid.
  • Add black salt,red chilli powder,jeera powder and Garam masala to it and mix.
  • Cool the mixture and grind it a fine puree.
  • Strain it and store it in a bottle in refrigerator. It stays good for 6-8 months.
Green Chutney:
  • Wash coriander and mint leaves drain out the extra water and let it drain for 15-20 mins.
  • Wash Green chillies and pat dry it.
  • Grind Mint,coriander,green chillies,chopped ginger,salt,sugar and lemon juice to a fine paste.
  • Pour the mixture in the Ice cube tray and freeze it and remove the cubes from it and place them in a zip lock bag or in a big container in freezer .
  • Use it when required.Stays good for 3-4 months.
Bhalla's / Vada's and arranging them:
  • Soak urad dal overnight or atleast for 1 hr.Use the round white variety urad dal for this.
  • Strain the soaked urad dal and grind it to a fluffy mixture in the grinder(even a mixie also does the same job,but in grinder you get more fluffy batter which is apt for making vada's).Add water only if needed,do not add much water while grinding this.Try to beat this mixture with hands for two mins continuously which helps in yielding fluffier vada's.
  • Mix in the raisins and salt and mix well.
  • Heat oil in a heavy bottomed kadai on medium heat and mean while grease your right palm(or wet your hands) and take a dollop of urad dal batter and slip it to the hot oil carefully and fry until golden brown on a medium flame.
  • Repeat the same process for the remaining mixture.Drop 4-5 at a time,do not drop in more or else they will stick to each other.
  • Meanwhile boil water in a big vessel until luke warm to medium hot.
  • Drop the urad dal fritters/bhalle's in the hot water and soak for a couple of minute.Take them out and squeeze carefully to form a shape of round.
  • Whisk the curds with black salt,sugar,red chilli powder,salt,hing,roasted cumin powder to get a smooth uniform mixture.
  • Pour a layer of the spiced dahi mixture in a wide flat bottomed bowl and arrange the bhalla's over it and pour the remaining dahi mixture over them until they are well covered.
  • Now decorate them with green and meetha chutney's.Sprinkle red chili powder,roasted jeera powder,chat masala in different patterns.
  • Garnish with chopped coriander,fine sev and finely chopped ginger.
  • Keep it in refrigerator until it is to be served.It tastes best when it is chilled.
Update:
This is going to participate in Pari's - 'Only Chaat' event .

clip_image004[8]

Thursday, November 4, 2010

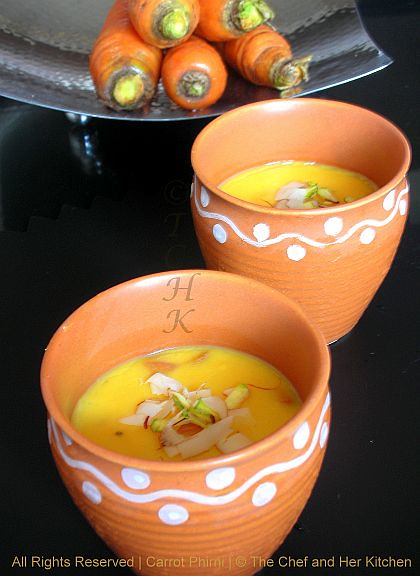
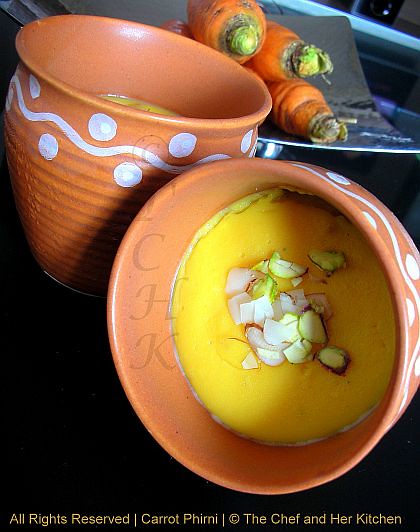
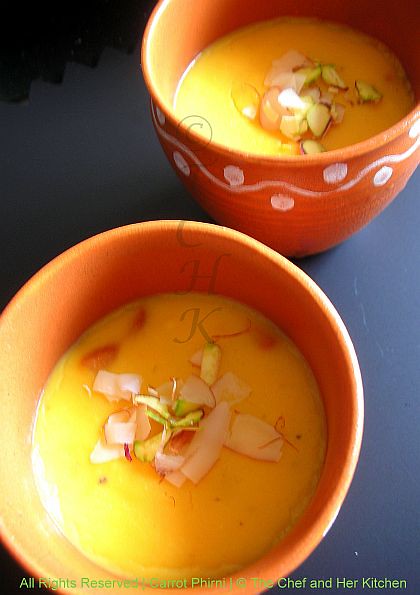
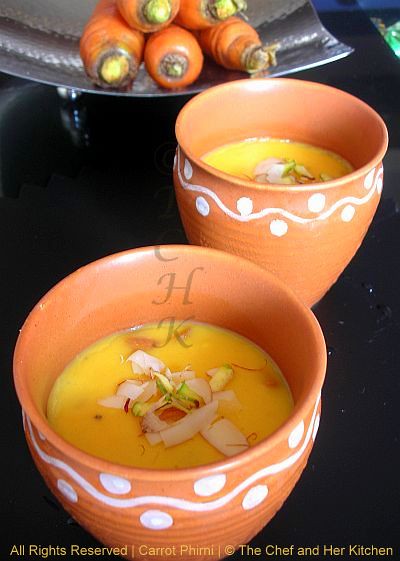
Carrot Phirni......and Happy Diwali!!!!


Phirni is a very rich and creamy rice pudding and is a popular traditional dessert in India.It is very simple to make when it is made bit carefully otherwise one can even mess up with this simple dessert.Phirni is more versatile and is more open to the flavors like kesar phirni,carrot phirni,Badam phirni,peach phirni,strawberry phirni,apple phirni,mango phirni etc etc.Even though kesar phirni is quite common at my place,the very first time I saw madhu's 'carrot phirni' I was really bowled with its lovely color and I wanted to make it immediately very badly.Since then carrot phirni also joined my dessert menu and now I would like to share with you.

Ingredients:
1/4 cup fragrant basmati rice
1/2 litre full cream milk

3 big carrots,peeled and steamed/boiled

1/2 cup sugar
few strands of saffron

3 tbsp chopped cashewnuts
3 cardamoms,extract seeds and pound in mortar and pestle
a pinch of nutmeg powder

2 tsp ghee
4-5 pistachios,slivered
4-5 almonds,slivered


Method:
  • Soak saffron in 2 tbsp warm milk for half an hour.
  • Soak basmati rice in water for half an hour.Drain the rice and grind to a slight coarse paste.Add boiled carrots and grind to a smooth paste.Do not make into a very smooth paste,a slight coarse paste works best in giving a nice texture to the dessert.
  • Heat ghee in a small pan and roast the cashew nuts until they turn light golden in color.
  • Heat milk in a thick bottomed pan when it starts bubbling,simmer the flame and slowly add the rice-carrot mixture and sugar and stir continuously until it forms a thick mixture.It takes approximately 8-10 mins.This step is most critical as you might end up with lumpy solution if you don't stir it continuously.If you end up having lumps,do not panic strain the mixture into another vessel and press the lumps in the strainer with the help of back of the laddle.Again keep the mixture back on the stove and continue cooking.
  • Add saffron milk,cardamom powder,nutmeg powder and fried cashewnuts and mix well.Once the mixture is thick turn off the stove.
  • Pour the mixture into the individual moulds/earthern pots and garnish with slivered/flaked almonds,pistachios and saffron strands.
Allow them to cool and keep in refrigerator for 2-3 hrs and serve chilled.This can be eaten warm,but the chilled one tastes better.This stay for 3-4 days if refrigerated.

Variations:
  • Kesar Phirni: Just avoid carrots in the above recipe and follow the same procedure.
  • Apple Phirni: Make kesar phirni as above and let it cool and before it gets set,add grated apples and mix and then let it sit.
  • Strawberry Phirni:Make kesar phirni as above and let it cool a bit,before it gets set add finely chopped fresh strawberries and mix and then let it sit.

Monday, November 1, 2010

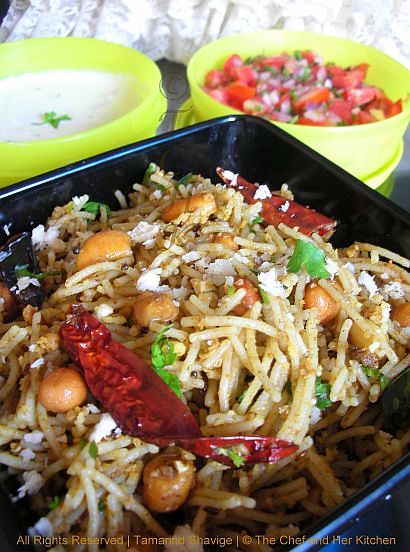
Tangy Tamarind Shavige/ Tangy Tamarind Rice Noodles

Tamarind rice noodles is a nice twist to the regular lemon based or coconut based rice noodles and tastes similar to the puliyogare/pulihora but is quite different in texture .This is an ideal food even on a festival day as no onion and garlic are used in preparing this recipe.The tangyness from tamarind is well balanced by the sweetness from the jaggery,where as the sesame seeds and coconut gives a nice nutty texture and hing adds a nice zing flavor to the noodles.All I can say is this is a completely packed with flavors and a well balanced meal.

Ingredients:
1 small pack rice noodles or 4 cups freshly pressed rice hoppers
1 big lemon size tamarind
3-4 tbsp groundnuts
4-5 cashewnuts,chopped
2 tbsp grated jaggery
1 tsp mustard seeds
2 tbsp chana dal
1 tbsp urad dal
4-5 dry red chillies,broken
3-4 green chillies,slit
a pinch of turmeric/haldi(optional)
2 generous pinches of hing
a sprig of curry leaves
2 tbsp oil(normal cooking oil what ever you use)
1 tbsp sesame oil
salt to taste

To roast and grind:
2 tbsp white sesame seeds
2 tbsp grated dry coconut
1/4 tsp methi seeds/fenugreek
1/4 tsp mustard seeds

for garnish:
2 tbsp grated fresh coconut
1 tbsp chopped coriander

Method:
  • Boil the rice noodles with some salt and oil in a big pot of water until they are cooked.Drain and keep it aside to cool.Spread on a wide plate in order to retain noodle strands separately.You can even use freshly pressed rice string hoppers which ofcourse gives you better taste than the ready made one's.
  • Soak tamarind in 1/4 cup of water for 10-15 mins or microwave the mixture for 1 min.Microwave method is quite quick when u have lack of time.After it is cooled add grated jaggery and mix well until it is melted completely.
  • Dry roast mustard,fenugreek seeds separately.Dry roast sesame seeds until they pop up.Cool them completely and grind all the roasted seeds along with grated coconut to a fine powder.
  • In a kadai heat normal oil and sesame oil and crackle the mustard seeds,add groundnuts and cashewnuts and fry until they turn red.Add chana dal,urad dal,red chillies,green chillies and fry for a couple of minutes until done.
  • Add curry leaves,hing and turmeric powder and fry for a minute and then add tamarind pulp mixture and mix until the mixture thickens completely.Add enough salt to it and mix.
  • Now remove it from the stove and let it cool a bit and reserve some mixture and pour the remaining mixture over the cooled rice noodles and also add the powder (ground) and mix properly until everything is well blended.Now check the taste of it and add more tamarind mixture or salt according to your taste.
  • Garnish with coriander and grated fresh coconut and serve.
Serve with salad and raitha.

Thursday, October 28, 2010

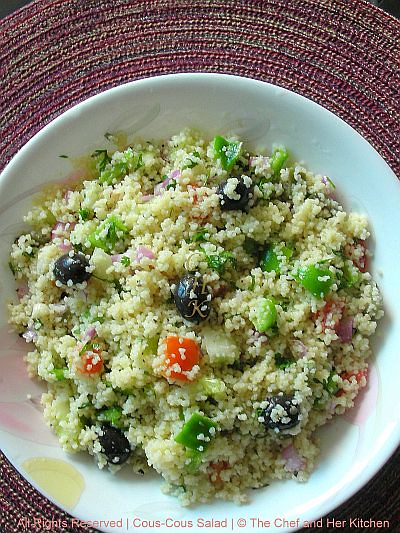
Cous Cous Salad

This is a very easy,healthy and filling salad which can be done in less than 15-20 mins and is a great crowd pleaser.I generally make it for my lunch or dinner so that I can enjoy the good healthy salad with some bread and lemonade which forms a very filling meal.The Preparation of this salad is no different from any other salad which we make regularly just that cous cous is added in a major portion to the regular salad.The choice of vegetables,nuts,beans,spices,herbs are left to our imagination and creativity.This is one combination of salad which I make regularly.

Ingredients:

1 cup Cous Cous
1 1/2 cup hot water approx

1 medium onion,cut into small cubes(you can even add spring onions)

1 medium capsicum,seeded and cut into small cubes(you can add any kind of peppers)
1 big tomato,seeded and cut into small cubes

1/4 cup small cubed cucumber

1/4 cup chopped coriander and some mint

8-10 seedless black/green olives
3-4 pickled gherkins/jalapenos,chopped
2 green chilies,very finely chopped
a handful of roughly chopped walnuts/pine nuts
1 tbsp extra virgin olive oil(EVOO)
salt to taste


For Dressing:
2 tbsp extra virgin Olive oil(EVOO)
2 tsp lemon juice
2 garlic pods,grated

salt to taste
Fresh ground pepper to taste


Method:
  • In a large bowl mix cous cous and pour hot boiling water and salt over it and mix well and cover it with a lid and keep it aside for 12-15 mins.Or Cook cous cous according to the package directions.
  • Now pour a tbsp of EVOO(olive oil) and fluff it up with a fork gently.
  • Now mix in all the diced vegetables(tomatoes,onions,cucumber,olives,capsicum), chopped green chillies,coriander and mint,walnuts and mix well with a wooden spatula.
  • Take a small bowl and mix olive oil,lemon juice,grated garlic,salt and pepper using a balloon whisk until everything is well mixed.
  • Pour the dressing over the cous cous mixture and mix well.
  • Refrigerate it for half an hour to one hour to allow the flavors to blend in the cous cous.
Garnish with some walnuts and coriander and serve it cold.

Notes and variations to the salad:
  • Various vegetables like Sauteed spinach or fresh baby spinach,blanched broccoli,colored bell peppers,grilled zucchini,boiled corn,spring onions and chopped basil can also be added according to your taste.
  • You can even add diced feta cheese or paneer to the salad.
  • You can even add boiled and salted garbanzo beans / Rajma / Lobia beans to the salad if you like.
  • Dry fruits like raisins,cranberries,chopped almonds can also be added.Roasted and coarsely ground peanuts can be added for different taste.
  • For dressing you can add a tsp of balsamic vinegar or regular white vinegar for different flavor.

Monday, October 25, 2010

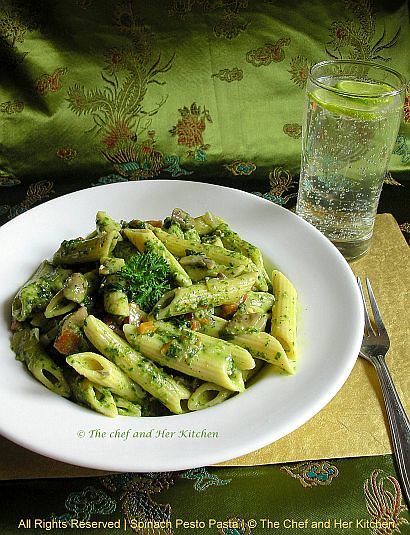
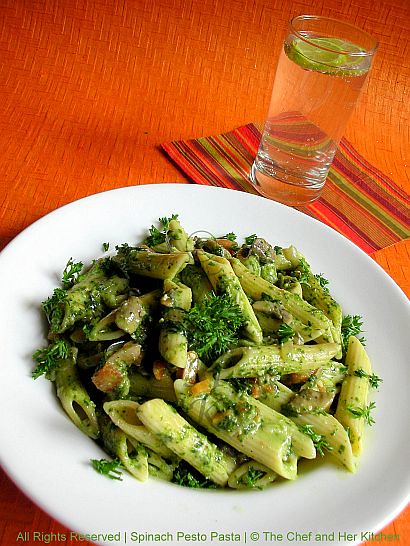
Spinach Pesto Penne Pasta

I always prefer making Pasta's for dinner and taking photograph's during night times is like a nightmare for me and that is why you will never get to see some recipes in my blog like pasta's,pizza's,noodles etc etc even though they are very much regular in my dinner menu.I even do very limited quantities which is sufficient for two of us and there is no way that I have any left over too.Recently I made this Spinach Pesto pasta for a get together and I was thankful that I had a small portion of left over which I could capture to showcase in my blog.

And coming to the recipe my hubby is a very big fan of pesto especially the basil pesto and he is not at all really fond of tomato based sauces.So I always end up making different kinds of pesto sauces and among which spinach pesto also has become our favorite.I generally add bechamel sauce to this pasta as I like my pasta bit rich and creamier without extra calories.I have mentioned some healthier options in the recipe for especially weight watchers which is equally delicious as the one with calories and if you are not really bothered about extra calories just follow the procedure and you will definitely enjoy this cheesy delicacy.This is a great dish for parties,get-together's and special dinner's and check the notes for a serving method for those occasions.


Ingredients:
4 cups penne pasta
12-15 button mushrooms,thinly sliced
1 carrot,finely chopped
1 big onion,sliced thin horizontally
4-5 big garlic pods,finely sliced
1 tsp mixed dried Italian herbs
1 tsp red chili flakes
2 tbsp grated parmesan to garnish(optional)
1 tsp chopped parsley for garnish
3 tbsp extra virgin olive oil(EVOO)
salt and ground pepper to taste

For Bechamel Sauce:
1/4 cup all purpose flour(or 1/4 cup whole wheat flour as a healthier option)
3 tbsp butter (or 3 tbsp extra virgin olive oil as a healthier option)
approx 300 ml hot milk
a pinch of grated nutmeg
a generous pinch of freshly ground pepper
salt to taste

For Spinach Pesto:
1 medium bunch spinach
a small bunch of fresh parsley(approx 1/4 cup)
1/4 cup pine nuts or 1/4 cup walnuts
2-3 tbsp grated parmesan cheese(optional,I did not use it but makes it more rich)
2 garlic pods
1 tsp freshly ground pepper
3-4 tbsp extra virgin olive oil
juice of 1/2 lemon
salt to taste


Method:
To Cook Pasta:
  • Cook according to the instruction of your package or follow this procedure:
  • Bring water to a boil in a big pot (filled to its half) and add salt,1 tsp olive oil and pasta and cook over medium flame for 10-12 mins until al dente(cooked and tender to teeth).
  • Drain and reserve 1/2 cup of water for later usage.you can even give a cold bath to the pasta by running it under fresh tap water which helps in keeping the pasts separate.
To make Spinach Pesto:
  • Boil water and add salt and chopped spinach and blanch for a minute or two and immediately let it go under a cold bath which helps in retaining the color of spinach.
  • Blend spinach with all the other ingredients under the pesto section to a slightly coarse sauce.If needed add some strained spinach water to ease in grinding.
To make Bechamel Sauce:
  • Heat butter/olive oil in a pan on medium flame and add flour/wheat flour and whisk immediately with a balloon whisk until it forms a smooth paste of it.
  • Now add slowly hot milk into this paste and whisk continuously until you get a smooth uniform mixture.Cook it for 2-3 mins until the raw smell of the mixture goes away by stirring it continuosly.
  • Season it with enough salt,pepper powder,ground nutmeg to it and mix well.
The Final Cooking of pasta:
  • Heat olive oil in a wide bottomed pan and fry sliced garlic until slight brown and crisp and add thinly sliced onions and fry until they are pink and soft.
  • Now add sliced mushroom and chopped caroot and cook until tender.
  • Add the spinach pesto sauce,bechamel sauce and mix well.Add 1/4 cup reserved pasta liquid if required add more to get a medium sauce consistency.
  • Add cooked pasta and mix well until all the pasta is covered with the sauce and is warm.Now add red chili flakes,Italian herbs,salt and pepper and mix well.
  • Dish it out to the serving platter and sprinkle some cheese over it.Garnish with chopped parsley.
Serve it with Lime Soda or drink of your choice.

Note:
  • You can make Basil Pesto in a similar way by just replacing blanched spinach with Italian basil while making pesto sauce.No need to blanch basil,just add it raw.
  • You can even avoid bechamel sauce in the above recipe but I personally add to give a nice creamy texture to the pasta.
  • You can even fill the pasta in a baking dish and cover with grated parmesan cheese(1/4-1/2 cup) and cover it with a foil and bake it in oven @ 160 degrees for 20 mins until the cheese melts.Serve it hot right from the oven.This would be a exclusive dish for parties especially or for special romantic dinners.

Friday, October 22, 2010

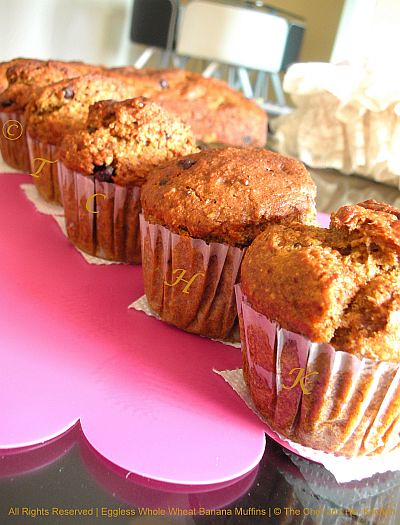
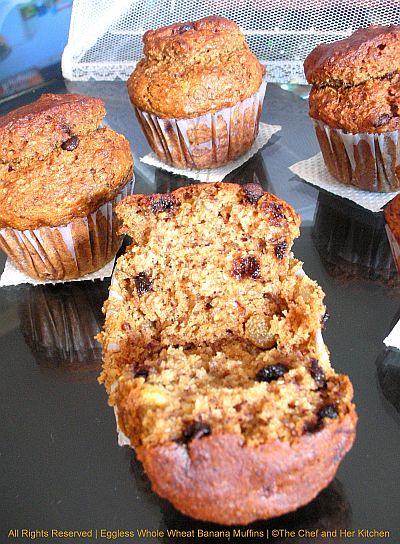
Eggless Whole Wheat Banana Muffins...goodness at its best!!!

Those were the days when I used to feel baking cakes or muffins is something suitable only for special occasions but now,not any more.But our blogger friends have made my assumption completely wrong by coming up with their innovative ways of making low fat versions and using healthier ingredients which suits our regular diet.I have come across many low fat recipes and this is one of them,When I saw Madhuri's Fatless strawberry banana muffins I liked the recipe instantly and ended up making it the very next day.The only thing I changed in the recipe was I added some extra sugar to suit my taste buds and I liked them a lot as they were absolutely guilt free.Recently during my blog hopping I hooked upon Usha's Cardamom flavored whole wheat banana bread which I liked again and then I made my own version of Banana bread taking some pointers from both the recipes.The result was just outstanding and I must say that this has become my own favorite recipe for eggless banana muffins.This is really a healthy treat for all the muffin lovers as it has all the healthy ingredients like oats,wheat flour, flax seeds,walnuts,dates and especially no eggs,no butter and no white flour.Walnuts,raisins and chocolate chips adds up the extra taste during each and every bite of muffin.However usage of oil is upto you and optional but it makes the muffins bit moist.This has taken a place in my regular breakfast menu now and I hope it will find its place in ur menu too..

Ingredients:
1 cup whole wheat flour,and 1 tsp wheat flour for dusting
1 cup quick cooking porridge oats

3 ripen banana's

1/2 cup milk
12-15 soft dates

1/3 cup sugar

1/4 cup oil,optional but I recommend to use it

1 tsp vanilla essence
3 tsp flax seeds
1/4 cup water
a generous pinch of salt
1 1/2 tsp baking soda
1/4 cup chopped walnuts

1/4 cup raisins

1/4 cup chocolate chips


Method:
  • Preheat the oven at 180 degrees for 10 mins.
  • Grind Oats to a fine powder in the mixer.
  • Dry roast flax seeds on a tawa/pan for few seconds and grind into a fine powder.Add this powder to 1/4 cup warm water and let it sit for 8-10 mins.
  • In a big bowl,mash banana's properly until they form smooth pulp.
  • Grind dates with 1/2 cup of milk and 1/3 cup of sugar to a fine puree.Mix in this puree into the smashed banana pulp.
  • Add oil,vanilla essence to the above mixture and mix well with a balloon whisk.Add the settled glutinous flax seed mixture to it and mix well.
  • Take another bowl and add wheat flour to it and add oats flour,baking soda,salt to it and mix them roughly.
  • Fold in the dry ingredients to the banana mixture and mix well.
  • Take a small bowl and add chopped walnuts,raisins and chocolate chips to it and dust it with 1 tsp of wheat flour.
  • Add the nuts mix to the batter and mix gently with a spatula.
  • Scoop out the mixture into the well greased paper lined muffin moulds and place it in preheated oven for 20 mins at 160 degrees.
  • This mixture will yield approximately 12 muffins.I made 6 muffins and the rest of the batter I pour into a loaf pan and made banana bread.Bread needs bit longer time to bake,approximately 30 mins.
  • Check the muffins/bread are done or not by piercing a tooth pick in the center and check whether it comes out clean.
  • Cool them on the wire rack and store it in air-tight containers.they stay good outside for 2 days.If you want to store them for longer time keep them in refrigerator.
While serving just pop them into the microwave and microwave for 20-30 seconds and serve it warm.You can even enjoy this as dessert by serving it with ice cream of your choice.