Friday, July 29, 2011

A Glimpse of my FFF-Series & a NOTE of THANKS

Firstly, let me tell a big THANK YOU to all my cousins who have shown tremendous enthusiasm for participating in my event. All their entries were well thought of and wonderful. Frankly, I didn't even ask for their advice when I conceptualized this event but I was surprised and overwhelmed with the response.Though they are not food bloggers the amount of dedication they showed with their excellent pictures and the step-by-step pictures stunned me more.They made my job easy by sending few of our traditional community specials which I had planned to prepare at a later date as they are really time consuming to make.
Many of my friends have mentioned that they really enjoyed and followed my series and few of them even tried out some recipes which turned out good. I would like to thank all my blogger friends and followers for giving constant support to my series with your encouraging comments.

Coming to the details of the series...I had chosen breakfast as the theme as it has lot of varieties and especially in our community we have so many breakfast specials. I received in total 13 entries for the event which were majorly contributed by Ashwini,Chaitra and Savitha who had sent 3 recipes each.Next comes 2 wonderful entries from my brother Prashi. Both his entries received the highest number of comments in this series and also his entries are few of those posts which are receiving more number of hits in my blog right now.One surprise entry from my cousin Vanitha really made me happy and I was also happy to include an entry from my MOM.I would love to tell you that more than half of the entries are of our community specials and if you are a breakfast kind of person like me you should definitely try these varieties.
While I know many of you followed the series but if any of you have missed it this round up will give you a glimpse of all the wonderful entries.
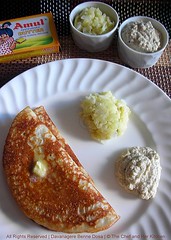
Entries from my Brother PRASHI:
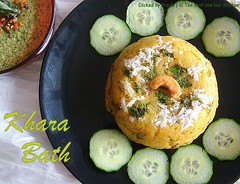


Khara Bath...Bramhin's Coffee bar Style!!!


Entries from my S-I-L Ashwini:
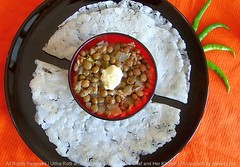
Link


Uttha Rotti with Avarekaalu Benne Usli


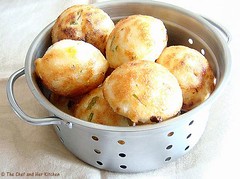
Atukula Gunta Ponganalu / Avalakki Paddu


Link


Entries from my cousin Chaitra:Link


Link


Link


Entries from my cousin Savitha:
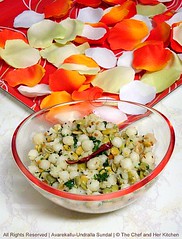


Link


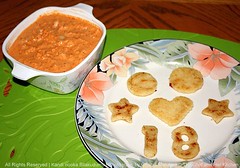
Mosaru(Curd) Kodubale/Rice flour Rings


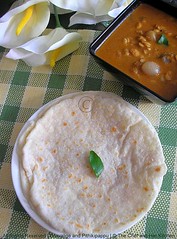
Entry from my MOM:


Entry from my cousin Vanitha:


I hope you enjoyed my series.Before I finish off the note for the round up,I would like to say that I will start this series again in a few months with a different theme.So friends kindly let me know what you would like to see in my next 'Cooking with Family' Series,your suggestions are most welcome and will also make it easy for me to decide the theme for my next series.I am all ears for your suggestions and comments regarding this series and the theme for the next series.

Monday, July 25, 2011

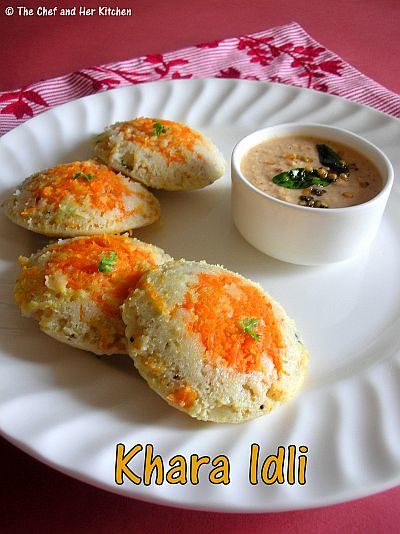
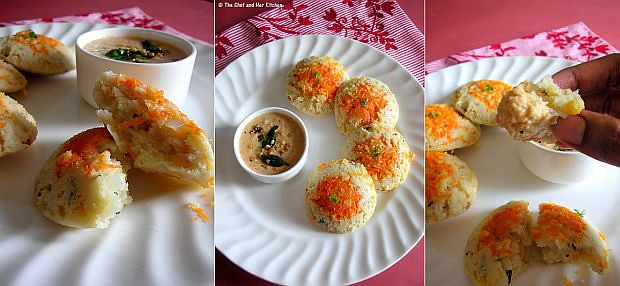
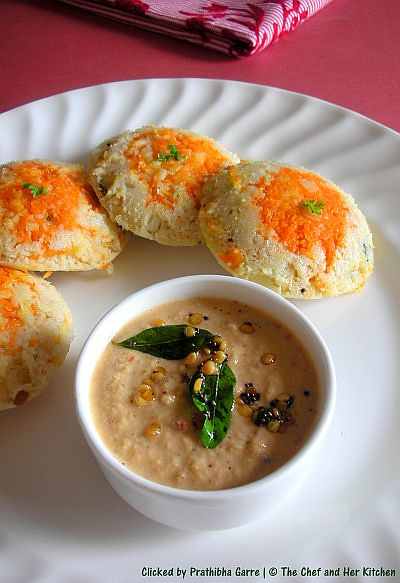
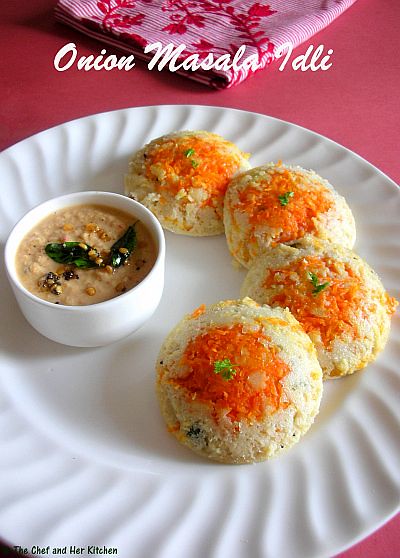
Khara Eerulli Idli | Masala Onion Idli | Spicy Idli..with left over Idli Batter

This recipe comes to rescue when your idli batter turns sour and not good to make regular idlis.The spiciness,sweetness from onions and carrots and the crunch of onions in each and every bite helps in compensating the sourness of the batter and makes the idlis delicious.It is ideal to use 4-5 days old idli batter for this recipe and if you want to try this one immediately just keep your idli batter at room temperature overnight which makes the batter bit sour.If you are bored of eating regular plain idlis,this spiced up masala idli would definitely be a treat for you and is a must try for all idli lovers.This was my today's breakfast which I would like to share with you all.
Ingredients:
3 cups idli batter(recipe follows)
2 medium Onions,finely chopped
1/4 cup Chana dal,soaked for 1 hr
2-3 tbsp chopped Coriander
1 medium Carrot,grated
a sprig of Curry leaves,chopped
1 tsp Green chilli paste
1/4 tsp cooking soda
1/2 tsp mustard seeds
1/4 cup grated carrot,for lining the idlis
Salt to taste
1 tbsp Oil

for Idli batter:
4 cups Idli rice
1 cup Urad dal
1 cup levelled Poha
1 tsp Fenugreek seeds
Salt to taste
Method:
for making Idli batter:
  • Soak idli rice overnight or at least for 5-6 hrs.Soak urad dal in a vessel and poha and fenugreek seeds in a separate vessel next morning and let them soak for at least 2 hrs.
  • Grind urad dal in the wet grinder until it is smooth,soft and frothy.Remove it from the grinder and put it in a big vessel.
  • Grind idli rice with poha and fenugreek seeds in the wet grinder to a slight coarse paste.Mix the mixture with the ground urad dal and add enough salt to it and mix well with your hand and let it ferment for 8-9 hrs.Some times fermentation depends on the weather,so if the weather is cold it might need another an hour or two extra for fermentation.You will get to see the rise in the level of idli batter once it is fermented and it is the indication.
  • This batter can also be used to make dosas.
for Khara Idli:
  • For Khara Idli it is ideal to use 4-5 days old batter which is bit sour.If you are planning to use fresh batter keep it aside overnight which helps the batter to become sour.
  • Soak chana dal in water for an hour.
  • Heat oil in a kadai and crackle mustard seeds and add finely chopped onions and saute until it is slight pink in color.Add green chilli paste to it and fry well.Switch off the flame and let the mixture cool a bit.
  • Add soaked chana dal,fried onion mixture to the batter.Add grated carrot,chopped coriander and chopped curry leaves to it and add extra salt(remember that we already added salt to the idli batter) and mix well.
  • Add soda to a ladle and mix it with a tsp of water and add this to the batter and mix it well,the batter becomes bit light.
  • Grease the idli plates with oil and place a tsp of grated carrot in and spread it a bit with hands and pour a ladle of idli batter until each impression is filled 3/4th.
  • Steam it in idli steamer or pressure cooker(with out whistle) for 10-12 mins.Let it rest for another 5 mins.
  • With a idli spoon cleanly remove the idlis.Dip the idli spoon in water in between which helps to remove the idlis easily from the plate.
Serve it hot with coconut chutney/Tomato chutney/Tomato-Onion Chutney.

Notes:
  • Khara Idlis taste best when the batter is sour and hence use 4-5 days old idli batter or if you want to use the fresh batter keep the batter outside overnight.You can even add a tsp of sour curds to the batter which also gives the sour taste.
  • You can use the same batter to make khara dosa.Make the dosas bit thick like uthappam and roast until crisp on one side.
  • Adding cooking soda is a must because when the batter turns sour,the idlis come out hard.So in order to get soft and fluffy idlis we should add cooking soda to the batter.
Variations:
  1. You can even add frozen green peas along with carrot in the recipe.
  2. You can even add finely chopped beans and capsicum in the recipe,you need to saute them along with onions for 2-3 mins.
  3. You can even add freshly grated coconut to the batter.
  4. You can place ghee roasted cashew nuts in the idli mold and then pour the batter over it which gives a nice look for the idly.

Friday, July 22, 2011

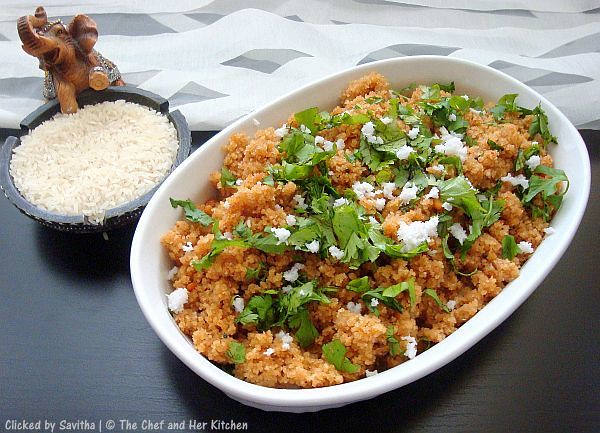
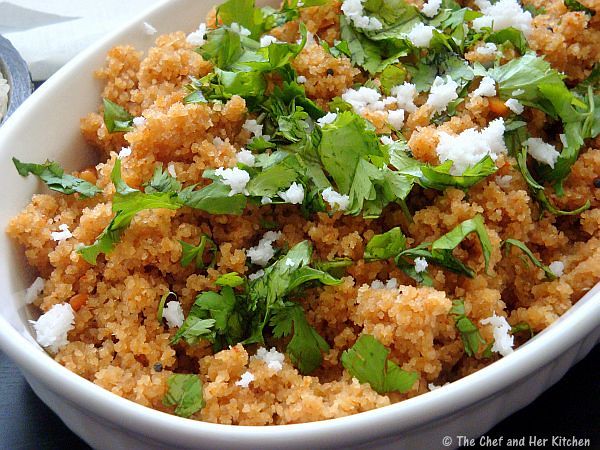
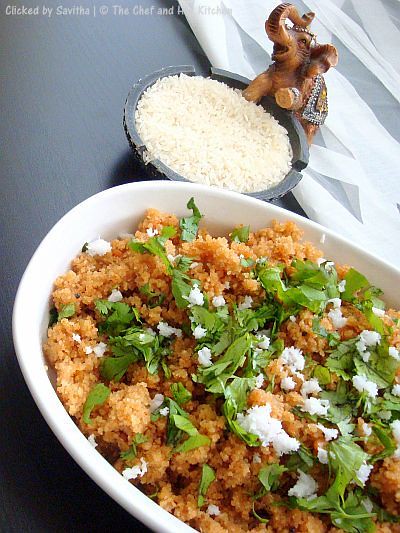
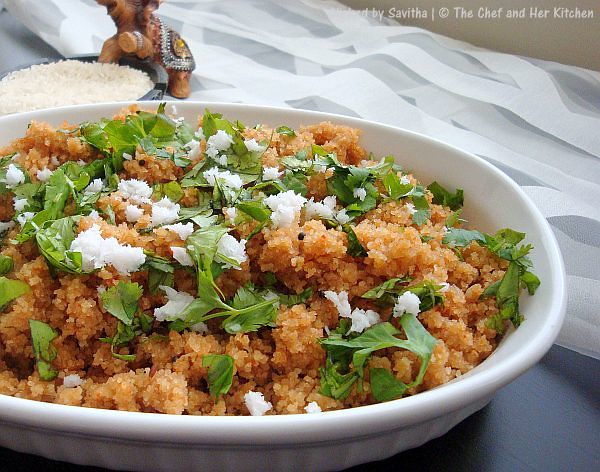
Kayi Biyyam Uppindi | Coconut-Rice Upma...FFF#13

This is the final week of my ongoing series Cooking with Family-Family Food Friday ,YES you read it correct,this is the last entry for my FFF series and I really thank you all for your support to me and my family members.If you have missed any of the previous posts in this series,check them here.
Today's post is sent to me by 'Savitha' who had already sent two wonderful entries earlier.Coming to the recipe,'Kayi Biyyam Uppindi' which can be translated as 'Coconut-Rice Upma' is a different traditional recipe and again is our community style breakfast.We generally say kayi for coconut and we use it a lot in our regular cooking,though I use it less...at my mom's place they use at least 2-3 coconuts per week.

This upma is not made with sooji,it uses rice and coconut and the process is quite different and makes the recipe unique.Rice is ground along with lots of coconut and spices and steamed like idly and then the upma is made with the crumbled idli mixture.The whole process is bit laborious process but worth the effort.I would like to thank Savitha again for sending this entry with step-by-step pictures.I am really impressed with the effort my family members had put in to take snaps and sending interesting unique entries for me and my followers.

Kayi Biyyam Uppindi/Kayi Uppittu Recipe:
(serves 2-3)

Ingredients:
2 heaped cups regular rice (sona masuri or equivalent)
3-3 1/2cups grated fresh coconut
2 1/2 tsp thick tamarind concentrate
18 red chillies
¼ cup jaggery
½ tsp baking soda
salt to taste

for Seasoning:
3-4 tbsp oil
1/2 tsp mustard Seeds
1 tbsp urad dal
2 tbsp chana dal
1/2 tsp cumin seeds
a pinch of hing
a sprig of curry leaves
3-4 tbsp chopped coriander

Method:
  • Soak rice for 3 hours.Grind the soaked rice in a mixer into a coarse mix (add very little water if necessary). It should resemble the texture of the sooji and keep it aside.
  • Grind coconut with jaggery, tamarind, red chillies and salt into a smooth paste by adding little water.
  • Mix the two mixtures well, add baking soda and stir it well again. The consistency should be like idly batter.
  • Apply oil to the inside edges of a vessel and pour this mixture into a vessel (the quantity mentioned here will require 2 vessels)
  • Steam the vessels in a pressure cooker without any weight(whistle) for about 30-35 min over medium-high flame. You don’t have to put any lid on the vessel inside. This process is similar to making idly.
  • After the steamed batter cools down, crush it using your hand into coarse powder as shown in the picture.
  • Heat oil in a separate vessel and crackle mustard seeds.Add urad dal, chana dal, jeera, curry leaves and fry until they turn red.
  • Add the powdered mixture and mix well.
  • Keep stirring it in medium heat by occasionally sprinkling water (about 1-1.5 cup of water in total). This is required to soften the mixture and make it a little moist.
  • Finally, garnish it with coriander leaves and grated coconut.
Serve it hot and enjoy. This dish tastes really good with yogurt.


Tuesday, July 19, 2011

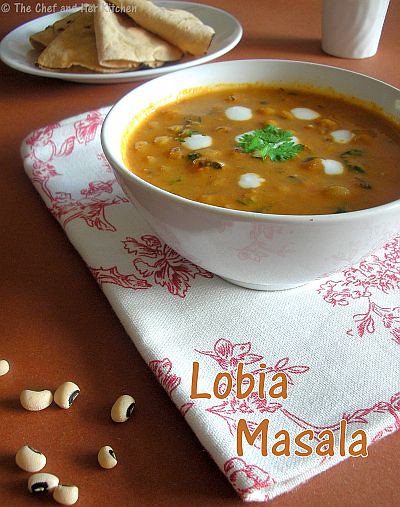
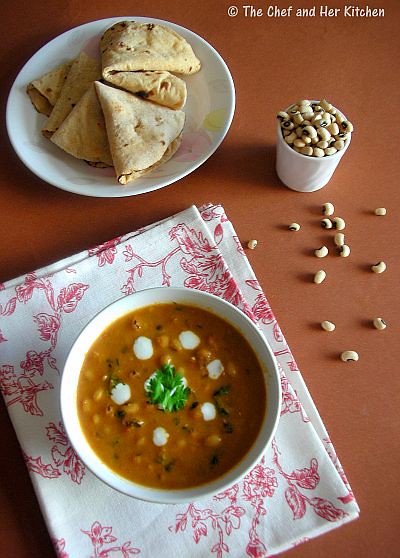
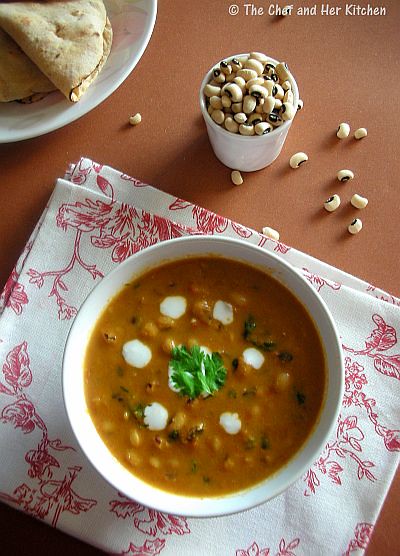
Lobia | Black-eyed Beans Curry..Creamy but Low fat!!

I never tasted this before marriage as we were not familiar with this recipe though it is made in South Indian way at home in the form of sundal,fritters and kurma.Before marriage my knowledge was limited to only few varieties of North Indian dishes and I used to make them occasionally in a rich manner.Those were the days I had never thought of calories and all those stuff and I used to make the North Indian gravies very rich as I used to prepare them once in a while.Only after marriage I realized low cal cooking is necessary on a daily basis and hence reduced my oil intake to a large extent.Hubby,having the very strong roots of Delhi always prefer North Indian dishes and he is also fond of rajma, lobia, chole and all those kind of pulses and beans.One of my friends taught me this recipe after my marriage and I can say that I developed liking to these kind of dishes like rajma,lobia only after marriage and now it is very common made at my place at least once a week.

Coming to the recipe,the preparation of this recipe is very much similar to my earlier Rajma recipe,just that the rajma beans are replaced by Lobia.As this is cooked on low flame for longer duration the texture of the gravy and beans turns very creamy and also the beans turn extremely soft with melt in mouth texture.If you want to make it rich you can go ahead with cream otherwise for a daily meal I suggest you to go with the addition of milk instead of cream.If you have not tried Lobia in North Indian style,do give a try for sure as it is really really tasty.
I have also mentioned two ways of making it,one is the traditional way and the other one is direct pressure cooking method which is way easier and apt when pressed for time.Personally I prefer the direct pressure cooking method as it helps the beans in absorbing all the flavors and masalas into it and also gives a nice creamy texture to the dish.

Ingredients:
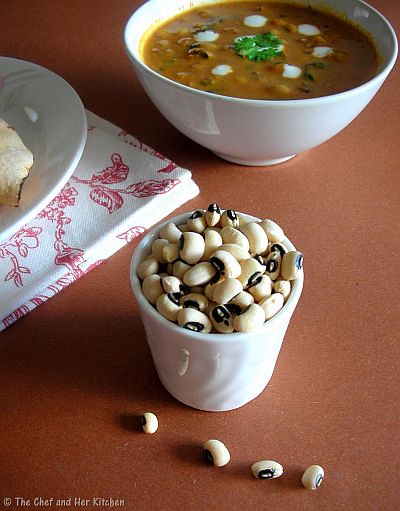
1 cup Lobia/black eyed beans/alasandulu
2 medium onions,finely chopped or grated onion
3 medium tomatoes,ground to a puree
1 tsp Ginger-Garlic paste
1 tsp Garam masala
1 tsp coriander powder
1/2 tsp cumin powder
3/4 tsp red chili powder
1/2 tsp amchur powder
2 tbsp chopped coriander leaves
3 tbsp cream or 1/2 cup milk
juice of 1/2 lemon
salt to taste

for tadka:
1/2 " cinnamon
1 bay leaf
1 green chilli
1 pinch hing
2 tsp oil
Method:
  1. Soak Lobia overnight in water with some salt .Add a pinch of garam masala to it and pressure cook on high for 2 whistles and simmer it and cook for 25-30 mins.
  2. In a pan,take oil add cinnamon stick,bay leaf,green chilli and fry,add hing and pinch of garam masala powder and fry a bit.
  3. Add finely chopped or grated onions and fry until its soft,now add ginger-garlic paste and fry until the raw smell goes away.
  4. Add ground tomato and fry it well.Add all the dry masalas and fry until the masalas leaves the oil at the edges.
  5. Add salt,cooked lobhia and mix everything and cover it and cook on a low flame for 8-10 mins.
  6. Add milk or cream and cook for a minute and switch off the flame.Do not cook for more time after you add cream/milk to it,otherwise it will curdle.
  7. Add coriander leaves and lemon juice and give a stir.
Serve it hot with roti/chapathi/paratha/jeera rice/peas pulav.

Direct Pressure Cooking easy method:
  1. Soak Lobia overnight and wash well a couple of times.
  2. In a small pressure cooker heat oil and add cinnamon stick,bay leaf,green chilli and fry,add hing and pinch of garam masala powder and fry a bit.
  3. Add finely chopped or grated onions and fry until its soft,now add ginger-garlic paste and fry until the raw smell goes away.
  4. Add ground tomato and fry it well.Add all the dry masalas and fry until the masalas leaves the oil at the edges.
  5. Add salt,cooked lobhia and mix everything and cover it with lid and pressure cook for 2 whistles and simmer it and cook on a low flame for 25-30 mins.
  6. After the pressure drops add milk or cream and reheat it for a minute over a low flame and switch off immediately.Do not cook for more time after you add cream/milk to it,otherwise it will curdle.
  7. Add coriander leaves and lemon juice and give a stir.
Serve it hot with roti/chapathi/paratha/jeera rice/peas pulav.

Friday, July 15, 2011

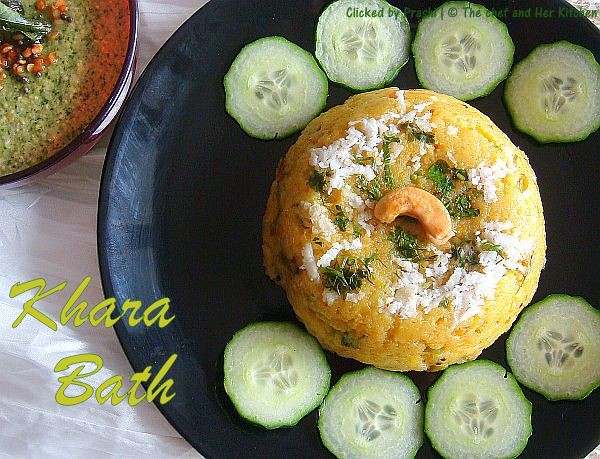
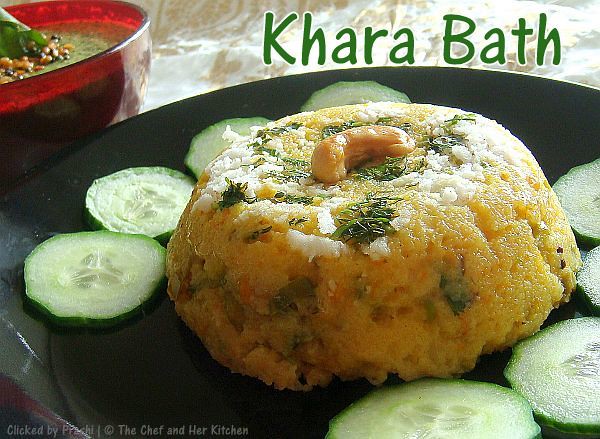
Kharabath.....Brahmin's coffee bar style!! FFF#12

Entered into 12 th week of my FFF series with another interesting breakfast recipe.Check out the ongoing series Cooking with Family-Family Food Friday and if you have missed any of the previous posts in this series,check them here.
LinkThis week's post is sent to me again by my sweet brother who had earlier sent the famous Davanagere Benne Dosa for my series,I almost threatened him to send his so called famous Kharabath and finally here is his entry.I have mentioned in my earlier post about how famous is the kharabath made by my brother at my place.Everyone likes his kharabath as he makes it really rich like how we get in Bangalore darshini's and he is also specialized in making Dosa,Andhra style dal,Fried rice and few other egg varieties.One thing I should agree that what ever he makes it turns out really really delicious and I feel that there is some 'jaadu' in his hands.I know I know reading all this,my brother would be already on cloud 9,so let me stop here boasting more about him otherwise it takes another few months for me to bring him down..ha ha..:)

Kharabath is one of the most famous breakfast items in all Upahara Darshinis in Bengaluru and generally it is paired with sooji halwa/kesaribath and is called 'Chow-Chow' bath which is a real satisfying breakfast.Most of the south Bangaloreans would be familiar with 'Brahmin's coffee bar' in Shankarpuram which caters excellent Idlis,wadas and Kharabath and superb coffee,if you are in Bangalore don't miss to try this joint.My S-I-L is a huge fan of this joint and she was quite happy with my brother's kharabath as it has tasted very similar to her favorite joint kharabath.Hence they named this Kharabath as 'Brahmin's Coffee bar style - Kharabath'.We do not know their trade secret for the recipe,this is an attempt to re create the taste of Kharabath which we get there and we are happy with the taste.

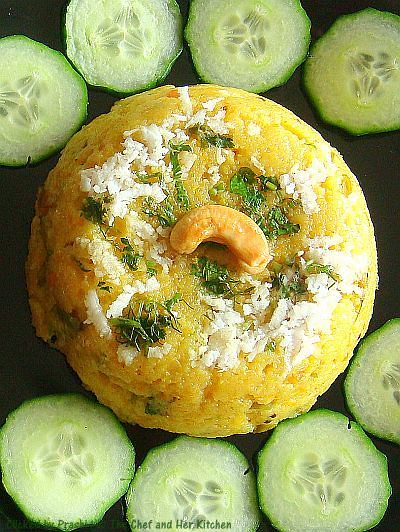
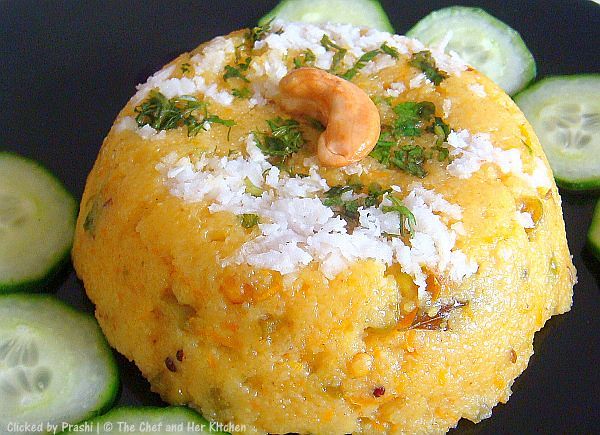
For people who are not familiar with kharabath let me tell you more about this.Kharabath is a closer cousin to regular rawa upma with additional ingredients and lots of ghee which gives a silky soft and melt-in-mouth texture to it,but taste wise it is no where compared to upma.Even if you do not like upma the moment you taste this you would be surprised with the texture and taste of it and also fall in love with this simple humble breakfast.Kharabath is generally served with coconut chutney and that is an excellent combo,so do make coconut chutney as well when you are making kharabath,they are like match made in heaven.The pictures did not do at least half the justice for the recipe,but believe me just follow the recipe blindly and you will have wonderful silky soft kharabath in front of you in minutes.
Khara Bath Recipe:(Serves 2)

Ingredients:

1 cup course Semolina(regular white rawa/sooji)
1 big Onion, finely chopped
2 green chillies, finely chopped
2 tsp Ginger-Garlic paste
2-3 tbsp chopped coriander
1 lemon,squeezed
2 tbsp grated wet coconut
8- 10 cashew nuts
1/2 tsp red chilli powder
1/4 tsp Garam masala
1/2 tsp of turmeric powder
8-10 curry leaves
1 tbsp ghee
Salt to taste

veggies required:
1 big Tomato, finely chopped
1 medium Carrot, grated
8-10 french Beans, finely chopped
1 small Egg plant, finely chopped
1/2 small capsicum, finely chopped
1 fistful cooked fresh/frozen peas

for tadka:
3 tbsp ghee
1/2 tsp mustard seeds
1/2 tsp jeera
1 tbsp chana dal
1 tbsp split urad dal
Method:
  • Dry roast rava until the aroma starts and turn light brown in color, cool it.
  • Heat 3 tbsp of ghee in a kadai and add cashew nuts and fry them till it turns golden brown and keep it aside.
  • To the same kadai, now add mustard seeds and let it crackle. Now add jeera, chana dal and urad dal and fry until light brown.
  • Add chopped green chillies,curry leaves and fry for few seconds. Now add finely chopped onions and fry until they turn light brown in color.
  • Add chopped egg plant and fry it for a couple of minutes.
  • Add finely chopped beans, capsicum, peas, tomato and cover it and cook for 3-4 min.
  • Now add ginger-garlic paste and cook until the raw smell is gone.
  • Add turmeric, red chilli powder, salt and garam masala to it and cook for a minute.
  • Meanwhile boil water in a separate container in the ratio(1C rawa:4C water) until it bubbles.
  • Add boiling water to it in the ratio of 1:4 (1- semolina :4-water) and cover it and let it again come to a boil.
  • When the water bubbles add semolina by continuously stirring it. Cover it and cook for 2-3 minutes on low flame until semolina is completely cooked.
  • Add lemon juice to it and mix well.
  • Garnish it with chopped coriander and grated coconut and fried cashew nuts and serve.Add a tbsp of ghee on top before serving.
Serve it hot with green coconut chutney and sliced cucumber.

Notes:
This is made up of ghee completely,however if you want to reduce the quantity of ghee you can use ghee and oil in equal parts and top it with an additional tsp of ghee.But the liberal usage of ghee gives the kharabath a special texture silky soft and nice aroma and taste.

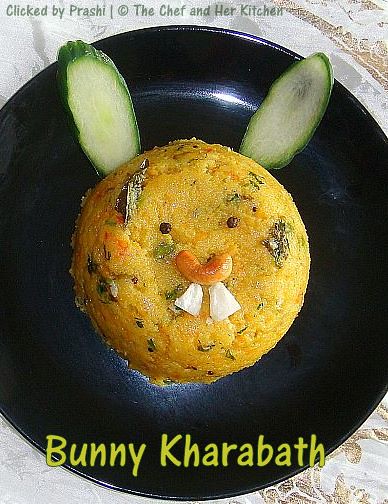
This is the plate decorated for my 2 yr old niece and hence named 'Bunny Kharabath'.She was so excited to see this and tried to pick up the cucumber slices from the plate.

Tuesday, July 12, 2011

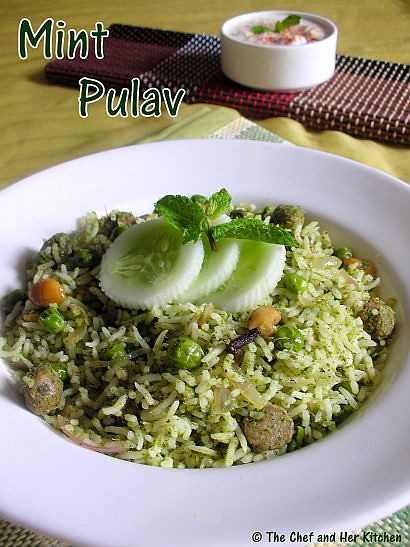
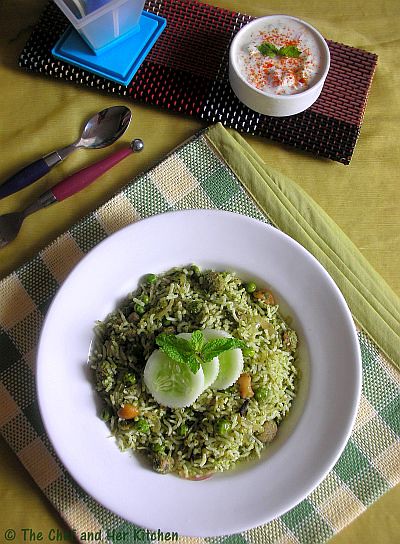
Mint Pulav | Pudina Rice

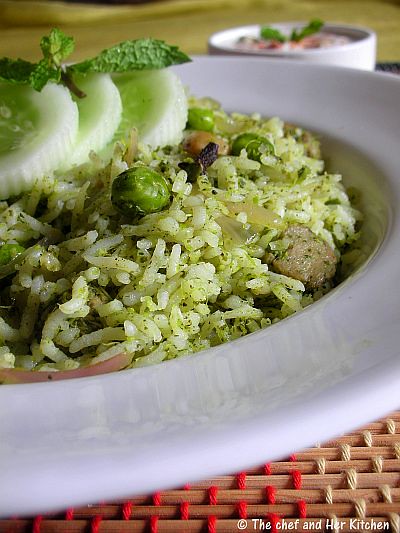
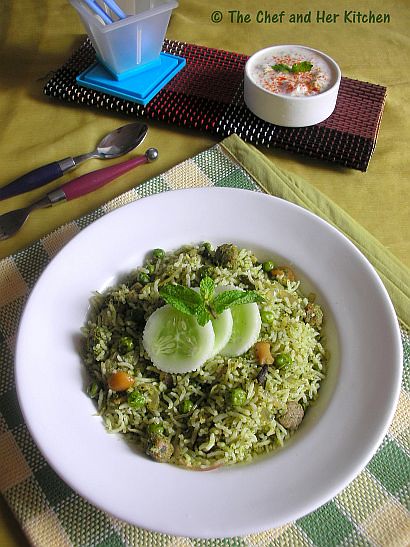
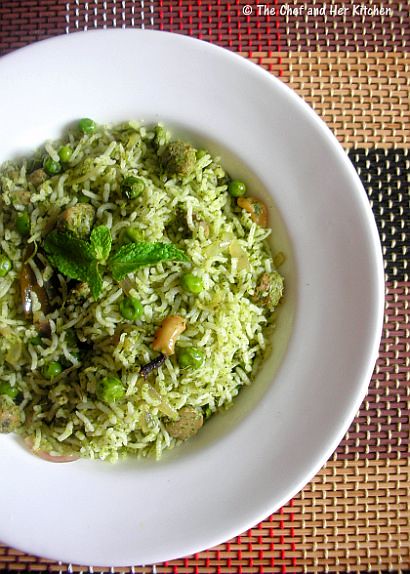
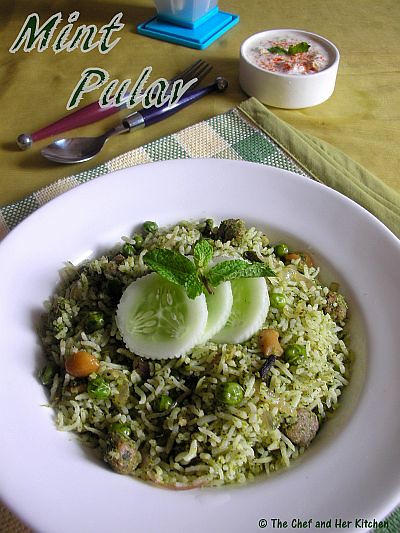
Pulav is once a week fare at my place as it is easy to make and yummy to eat and also is good for lunch boxes or as a nice one pot meal for a weekend lunch.I make various kind of pulavs which I directly make in pressure cooker or rice cooker by sauteing all the masalas and rice and pressure cook together,but this pulav is bit different as the rice is prepared separately and is mixed with a masala paste which helps in retaining the fresh aroma of mint leaves and also eye-catching color.Mint is one of the most flavorful herbs and is must while making biriyanis to get that special flavor and I assure you that this pulav is truly flavorful as it is loaded with mint flavor.I like to add soya chunks to pulavs as they absorb the strong flavors of pulav and it is a pleasure to bite into those chewy flavorful soya chunks in pulavs.However if you don't prefer adding soya chunks to pulav you can go ahead with roasted baby potatoes or blanched mixed vegetables or paneer cubes instead of soya chunks and is completely your choice.
Ingredients:
1 cup Basmati rice
2 potatoes/10-12 baby potatoes or 1/3 cup soya nuggets
1 big onion,finely sliced
1/3 cup fresh/frozen peas
juice of 1/2 lemon or 2 tsp lemon juice
salt to taste

to temper:
2 tbsp broken cashew nuts
3-4 laung/cloves
1/2" cinnamon
2-3 green cardamom
1 bay leaf
2 tbsp ghee
2 tbsp oil

masala-to grind:
1 bunch(1 cup) fresh mint leaves
3 tbsp fresh grated coconut
1/2" ginger piece
6-7 green chillies
1 tsp oil
Method:
  • Wash and soak basmati rice in water for 10-15 mins and cook it until done.You can cook it in either pressure cooker with the proportion 1c-rice:1 3/4c-water or in the rice cooker 1c rice: 2c water.
  • Spread it over a plate and add a tsp of ghee all over it after spreading it,it will keep the rice granules separate.Let the rice cool completely.
  • Pressure cook soya nuggets(or potatoes) for 2 whistles or cook it on stove top.I made rice and soya nuggets in different compartments in cooker.
  • If you are using potatoes peel them and cut into cubes,if you are using baby potatoes remove the skin and prick them using fork.If you are using soya nuggets after cooking them squeeze out the water from it and keep them aside.
  • Clean and wash the mint leaves and let them drain excess water.
  • Heat a tsp of oil and add mint leaves and saute it for a minute until they wilt.Add green chillies,ginger and grated coconut and slightly warm it and let it cool completely.Grind it into a paste by adding half of the lemon juice and open the lid and keep it separately.Adding lemon juice will help in discoloration and also keep it open.
  • Heat oil and ghee in a thick bottom kadai and add cloves,cardamom,cinnamon and bay leaf and add chopped cashews and fry until light brown in color.
  • Add sliced onions and fry well until they bit dark brown in color and add fresh/frozen peas to it and fry well.
  • If you are using potatoes add them now and let them roast a bit until you get brown patches on it.If you are using soya nuggets no need to fry them much,just add them.
  • Add ground paste and fry well until the raw smell goes away.This takes a couple of minutes.
  • Add cooked and cooled rice,salt and lemon juice and mix carefully until everything is well mixed and the rice is warm.
Serve it hot with cucumber-onion raitha and papad.

Note:
  • I have used small soya nuggets in the recipe,it is your wish to add soya nuggets or potatoes in the recipe.
  • If you add lemon juice while grinding the mint leaves it will help in retaining its color.
  • You can even pressure cook the masala along with rice but I like the freshness and flavor retained by mint when sauteed separately and mixed with rice.
  • As the mint has strong flavor in taste,the bland tasting soya nuggets soak all the flavors from the mint masala and makes it extra flavorful chewy bites in pulav,so I recommend to use soya nuggets in this recipe.